How to Choose a PC Case for a Large Air Cooler
A large CPU air cooler can provide excellent cooling performance without requiring a liquid-cooling system. But before installing a dual-tower heatsink, there is one important question to answer:
Will the entire cooler actually fit inside your PC case?
A case might advertise 170mm of CPU cooler clearance, while your chosen cooler measures 168mm tall. That sounds compatible until you discover that your RGB memory requires the cooler's front fan to sit several millimeters higher.
Suddenly, the side panel may no longer close.
Choosing a PC case for a large air cooler involves more than matching two dimensions. You also need to consider RAM height, motherboard heatsinks, fan positioning, case airflow, and maintenance access.
This guide explains how to evaluate those requirements before buying, so you can build a system that fits properly and cools effectively.
What Makes a PC Case Compatible With a Large Air Cooler?
A PC case is compatible with a large CPU air cooler when it provides enough physical space for the complete installed cooling assembly.
The most important specification is maximum CPU cooler clearance, usually expressed in millimeters.
This measurement describes the maximum supported cooler height according to the case manufacturer's design.
However, the cooler itself may have several dimensions that affect installation:
Total heatsink height.
Fan height and mounting position.
RAM clearance beneath the front fan.
Width and depth around the CPU socket.
Clearance around motherboard VRM heatsinks.
Space between the cooler and side panel.
A large dual-tower cooler may fit vertically while interfering with memory modules or nearby motherboard components.
Likewise, a cooler that fits around the CPU socket may extend too far toward the side panel once its fans are installed.
For a detailed explanation of the measurement itself, see our guide to measuring CPU air cooler clearance for your case.
The practical goal is to verify the cooler's complete installed configuration, not just the dimensions of the bare heatsink.
How Much CPU Cooler Clearance Do You Need?
Start by comparing the case manufacturer's maximum cooler-height specification with the cooler manufacturer's total installed height.
A simple calculation is:
Nominal Height Margin = Case CPU Cooler Clearance − Installed Cooler Height
For example, if a case supports a 175mm CPU cooler and the cooler measures 165mm tall:
175mm − 165mm = 10mm
The nominal height margin is 10mm.
This is useful, but it assumes the cooler is installed in the configuration represented by its published dimensions.
If the front fan needs to move upward to clear tall RAM, the final height may increase.
Should You Leave Extra Clearance?
Where practical, a few millimeters of additional space can make installation easier and reduce uncertainty caused by measurement differences.
A planning margin of approximately 5–10mm is a reasonable preference for many large air-cooling builds.
However, this is not a universal manufacturer requirement.
A smaller margin may be acceptable when the exact cooler, motherboard, RAM, and case combination has been verified.
Conversely, even 10mm of unused height does not guarantee compatibility with surrounding motherboard components.
Practical Clearance Comparison
Case Cooler ClearanceCooler Installed HeightNominal MarginWhat It Means165mm160mm5mmPotentially workable; check exact fit170mm168mm2mmTight; verify every dimension175mm165mm10mmMore installation flexibility180mm168mm12mmComfortable nominal margin if fan height is unchanged180mm181mm−1mmExceeds published clearance
These examples only compare vertical dimensions.
They do not guarantee compatibility with a particular motherboard, memory kit, or side-panel design.
Why RAM Height Can Change Your CPU Cooler's Total Height
RAM clearance is one of the most easily overlooked compatibility details when choosing a large dual-tower air cooler.
Many dual-tower designs place a front fan above or near the memory slots.
If the installed RAM modules are taller than the available space beneath the fan, the fan may need to be raised.
That adjustment can increase the cooler's overall height.
Real Example: Noctua NH-D15 G2
Noctua specifies a total height of 168mm for the NH-D15 G2 in its standard dual-fan configuration.
The cooler provides 32mm of RAM clearance with the front fan in its default position.
Now consider a build using 45mm-tall memory.
If the fan overlaps the RAM and must move upward by the full height difference:
45mm − 32mm = 13mm
The estimated installed cooler height becomes:
168mm + 13mm = 181mm
Under these assumptions, a case with 180mm maximum CPU cooler clearance would be insufficient.
The calculation is based on Noctua's published installation geometry, but the exact result depends on the motherboard and fan position.
How Can You Solve a RAM Clearance Problem?
There are several possible approaches.
Choose Lower-Profile RAM
Memory modules with shorter heat spreaders may fit beneath the original fan position.
This avoids increasing the cooler's overall height.
Raise the Front Fan
Some air coolers allow the front fan to be moved upward.
This can improve RAM compatibility, but it requires additional case clearance.
Use a Smaller Front Fan
For certain coolers, a smaller compatible fan can provide additional memory clearance without increasing the total height.
The alternative fan must be supported by the cooler's mounting system.
Use an Approved Single-Fan Configuration
Some dual-tower coolers can operate with only the center fan.
However, this may reduce cooling performance.
Before making this change, confirm that the manufacturer supports the configuration and verify CPU temperatures under your intended workload.
For the NH-D15 G2 specifically, Noctua documents these alternatives in its official case and RAM compatibility guidance.
Does PC Case Width Determine Air Cooler Compatibility?
A wider PC case may provide more room for a tall CPU cooler, but exterior width alone cannot confirm compatibility.
Internal space is influenced by the position of the motherboard tray, side-panel mounting system, and other structural components.
For example, two cases with similar external widths may have different CPU cooler limits.
One may allocate more room behind the motherboard for cables.
Another may provide more space in the main chamber.
Potential differences include:
Motherboard tray depth.
Rear cable-management space.
Tempered-glass mounting structures.
Side-mounted fan brackets.
Internal frame rails.
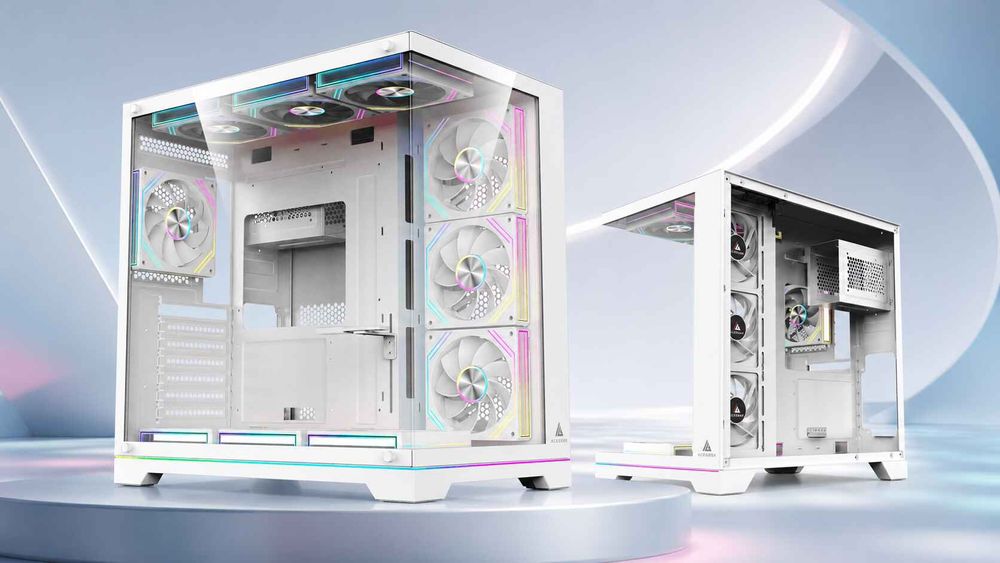
Dual-chamber construction.
Decorative side-panel designs.
This is why the manufacturer's published maximum CPU cooler clearance is more useful than calculating compatibility from exterior width alone.
For example, a dual-chamber case can be relatively wide while allocating a substantial portion of its width to the power supply and cable compartment.
That does not necessarily leave more room above the CPU socket.
Always check the exact cooler-clearance specification for the case model.
How to Check Motherboard and Cooler Interference
Even when the cooler fits within the maximum height limit, its width and depth may create installation conflicts.
Large dual-tower heatsinks often extend across a substantial portion of the upper motherboard area.
RAM Slot Interference
Some heatsinks and front fans overlap the memory slots.
Check the cooler manufacturer's RAM compatibility information for your motherboard and memory kit.
Do not assume that every dual-tower cooler provides identical clearance.
VRM Heatsink Clearance
Modern motherboards may use large voltage-regulator heatsinks around the CPU socket.
These components can interfere with cooler heatpipes, fin stacks, or mounting hardware.
Motherboards with decorative rear I/O covers may introduce additional restrictions.
Top Case Fan Clearance
A large tower cooler may sit close to the case roof.
Top-mounted case fans, particularly thick models, can interfere with fan clips or heatsink edges.
Check whether the top fans can be installed and serviced after the CPU cooler is mounted.
Rear Exhaust Fan Clearance
Tower coolers commonly direct air toward the rear case exhaust.
However, the rear fan frame, mounting hardware, or unusually thick fan designs may interfere with a large heatsink.
Confirm that the CPU cooler and rear exhaust fan can coexist without physical contact.
Motherboard Socket Compatibility
Physical case clearance does not replace CPU socket compatibility.
The cooler also needs a mounting kit suitable for the selected Intel or AMD socket.
Before purchasing, check the exact cooler, socket, and motherboard compatibility information.
Some manufacturers offer detailed compatibility databases that are especially helpful for large air coolers.
What Is the Best Airflow Layout for a Large CPU Air Cooler?
A large heatsink needs an effective supply of cooler air.
Even a high-performance dual-tower cooler may operate less efficiently if the case has restrictive intake openings or poorly positioned exhaust fans.
For many conventional mesh-front PC cases, a practical starting layout is:
Front Intake → CPU Tower Cooler → Rear Exhaust
This provides a relatively direct path for air to travel through the CPU heatsink and leave the chassis.
Front Intake Fans
Front intake fans supply fresh air to the main component chamber.
A ventilated mesh panel can help reduce airflow resistance compared with a more restrictive solid panel.
However, dust filters and internal structures also affect airflow.
The objective is to provide the CPU cooler with sufficient intake air without unnecessarily increasing fan noise.
Rear Exhaust Fan
A rear exhaust fan positioned near the CPU tower helps remove heated air from the case.
For many tower-style coolers, aligning the heatsink airflow with the rear exhaust provides a straightforward cooling arrangement.
Check the cooler's actual fan direction before installation.
Top Exhaust Fans
Top exhaust can help remove warm air, but additional fans do not always improve CPU cooling.
A top-front exhaust fan may remove some incoming fresh air before it reaches the CPU tower in certain layouts.
This effect depends on the case geometry, fan speeds, and cooler position.
Start with a sensible intake and rear-exhaust configuration, then test whether additional top fans provide a measurable benefit.
What About Panoramic Cases?
Panoramic cases often use glass front panels and rely on side intake instead of traditional front ventilation.
A large tower cooler can still work effectively in this layout if side fans deliver enough fresh air toward the CPU area.
Bottom intake may also support GPU cooling.
However, the airflow path must be considered as a complete system.
For practical setup guidance, see our article on configuring side intake fans in a panoramic PC case.
Real PC Case Examples: 170mm vs 180mm Cooler Clearance
Published product specifications can help buyers understand how different cases accommodate large air coolers.
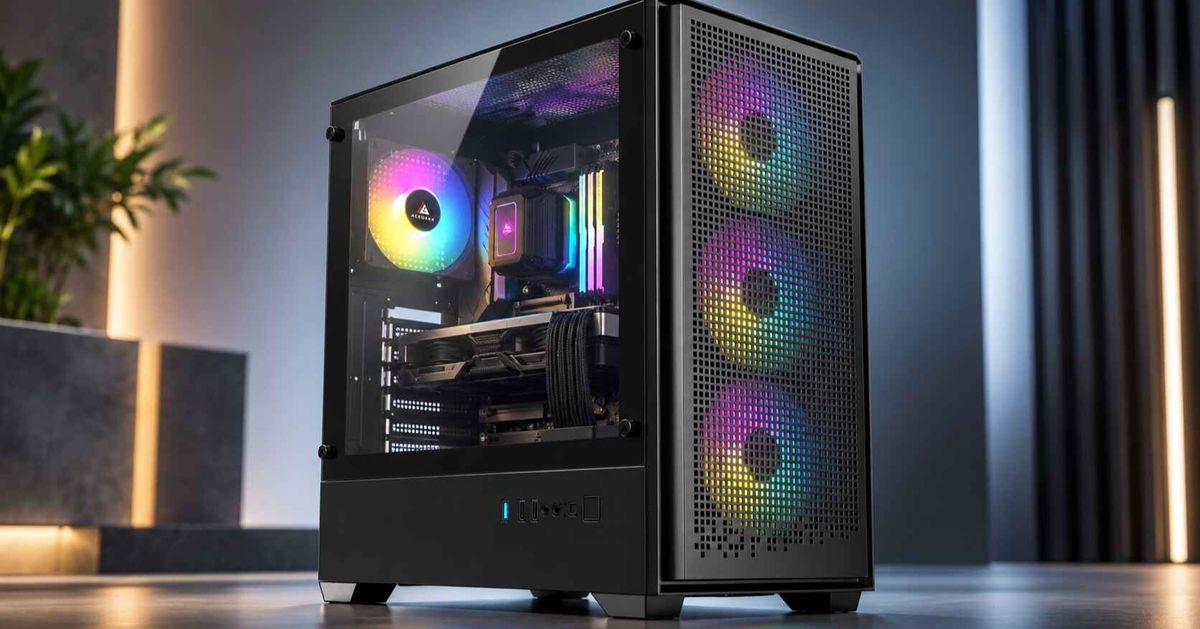
Consider two ACEGEEK models.
SpecificationACEGEEK QubeACEGEEK LunarisFlowMaximum CPU cooler clearance170mm180mmCase dimensions400 × 220 × 445mm483 × 238 × 490mmMaximum GPU clearance330mm400mmMotherboard supportE-ATX / ATX / M-ATX / ITXATX / M-ATX / ITXRear fan support1 × 120mm1 × 120mmTop fan support2 × 120mm or 2 × 140mm3 × 120mm or 3 × 140mm
Official specifications: ACEGEEK Qube and ACEGEEK LunarisFlow.
ACEGEEK Qube: 170mm Clearance
The Qube lists a maximum CPU cooler height of 170mm.
A 160mm air cooler would have a nominal height margin of 10mm.
A 168mm cooler would have only 2mm of nominal clearance.
This does not automatically mean the taller cooler is incompatible, but the exact installation deserves more careful verification.
If tall RAM requires additional front-fan height, the available margin may disappear.
ACEGEEK LunarisFlow: 180mm Clearance
The LunarisFlow lists a maximum CPU cooler height of 180mm.
With a 168mm cooler in its standard configuration, the nominal margin is 12mm.
This provides more height flexibility than the Qube example.
However, if the cooler's installed height increases to approximately 181mm because of a raised front fan, it would exceed the published limit.
Which Case Is Better for a Large Air Cooler?
The answer depends on the exact cooler and supporting hardware.
The LunarisFlow provides more published CPU cooler height clearance.
The Qube may still be suitable for many large air coolers with lower total installed heights.
Neither model's specification sheet establishes the actual CPU temperature or noise level for a particular build.
For a reliable decision, compare the complete cooler dimensions, motherboard compatibility, RAM height, case airflow, and installation requirements.
How to Choose the Right Case Before Buying
A useful selection process starts with the cooler and motherboard rather than case appearance alone.
Step 1: Identify the Exact CPU Cooler
Find the manufacturer's official specifications.
Record its total installed height, width, depth, socket support, and fan configuration.
If the cooler includes adjustable fans, determine whether their position may change the installed height.
Step 2: Check the RAM Dimensions
Find the exact height of your memory modules.
Compare that figure with the cooler's supported RAM clearance.
If the front fan overlaps the memory, determine whether the fan must be raised.
Step 3: Calculate the Installed Cooler Height
Use the manufacturer's standard height as a starting point.
Add any increase required by the actual fan position.
For adjustable designs, verify the result using official installation diagrams whenever possible.
Step 4: Compare the Case Clearance
Find the maximum CPU cooler height supported by the exact case model.
Compare this figure with the final installed cooler height.
A few additional millimeters may make installation and maintenance easier, but there is no universal margin that guarantees compatibility.
Step 5: Check Surrounding Components
Verify clearance around the motherboard VRM heatsinks, RAM slots, rear fan, and top-mounted cooling hardware.
Check that the cooler can be installed without forcing components into position.
Step 6: Review Case Ventilation
Determine where fresh air enters and where heated air exits.
For conventional tower coolers, a direct intake-to-heatsink-to-exhaust path is a sensible starting point.
For panoramic cases, evaluate whether side intake can supply the CPU cooler effectively.
Step 7: Consider Installation and Maintenance
Large coolers can make motherboard access more difficult.
Check whether you can reach fan clips, memory modules, CPU power connectors, and nearby mounting screws.
A technically compatible build may still be inconvenient to maintain if the cooler blocks essential components.
Large Air Cooler Compatibility Checklist
Before purchasing, review the following requirements.
Compatibility ItemWhat to VerifyCooler heightTotal installed height, including fansCase clearanceMaximum supported CPU cooler heightRAM clearanceActual memory height and front-fan overlapFan adjustmentAdditional height from a raised fanCPU socketCompatible mounting hardwareMotherboardVRM heatsink and socket-area clearanceSide panelNo unwanted contact with cooler or fan clipsRear exhaustAdequate physical clearance and airflow alignmentTop fansNo interference with heatsink or cablesCase intakeEffective fresh-air supplyGPU compatibilitySufficient card and power-cable spaceMaintenancePractical access to fans, RAM, and connectors
These checks help distinguish a verified compatible installation from a combination that only appears suitable on paper.
How to Check Cooling Performance After Installation
Once the system is assembled, verify both physical compatibility and thermal performance.
A case with generous clearance can still perform poorly if the intake airflow is restricted.
Start by confirming that the cooler fans rotate normally and follow the intended control profile.
Then run a repeatable workload.
Monitor:
CPU package temperature.
CPU package power.
Fan speed.
Effective clock speed.
Thermal-throttling indicators.
Room temperature.
If temperatures are higher than expected, investigate airflow restrictions, fan orientation, CPU power settings, and cooler installation.
Do not assume the case is too small simply because the CPU runs hot.
Poor mounting contact can also reduce heat transfer.
Our guide to how mounting pressure affects CPU cooling performance explains how the cooler's contact with the processor can influence temperature.
Compare results under similar workload and ambient conditions before making hardware changes.
Frequently Asked Questions
1. Why Does My CPU Cooler Fit Without the Front Fan but Not With It Installed?
The heatsink may fit inside the case while the front fan extends beyond the available height.
This commonly happens when the fan overlaps tall RAM modules and must be raised.
Check the cooler's standard height, RAM clearance, and final fan position.
If the combination exceeds the case limit, consider lower-profile memory, a supported smaller fan, or a different cooler or case.
Do not force the side panel closed against the fan frame.
2. Can I Use a Dual-Tower Air Cooler With Only One Fan?
Some dual-tower coolers support operation with a single center fan.
However, removing a fan may reduce cooling capacity or change acoustic performance.
Whether this configuration is appropriate depends on the cooler design, processor power consumption, and workload.
Check the manufacturer's instructions before changing the fan arrangement.
Afterward, monitor CPU temperatures and thermal-throttling behavior under sustained workloads.
3. Can a Large CPU Air Cooler Interfere With Top Case Fans?
Yes.
Large heatsinks can extend close to the upper edge of the motherboard.
Depending on the chassis, this may create interference with top-mounted fans, fan frames, CPU power cables, or motherboard heatsinks.
Check the available space around the cooler's upper edge and the position of the top fan brackets.
A case supporting top fans does not necessarily guarantee that every top fan configuration will fit alongside every large CPU cooler.
4. Is a Mesh-Front Case Better for a Large Air Cooler?
A mesh-front case can provide an effective airflow path for a large tower cooler because outside air can enter through the front ventilation area.
However, cooling performance depends on the actual mesh openness, filters, intake fans, and exhaust configuration.
A panoramic case with well-positioned side intake can also provide effective air cooling.
The best case is the one that delivers sufficient fresh air to the heatsink while maintaining acceptable temperatures and noise.
5. Why Is My CPU Hot Even Though the Air Cooler Fits Correctly?
Physical clearance does not guarantee effective heat transfer or airflow.
Possible causes include incorrect mounting pressure, thermal paste problems, restrictive case ventilation, unsuitable fan curves, or unusually high CPU power consumption.
First, compare CPU temperature with package power and the processor's specified operating limits.
Then check cooler fan operation, airflow direction, mounting hardware, and heatsink contact.
A larger case may not solve the problem if the underlying cause is improper installation or insufficient cooler capacity.
Find the Right Balance Between Cooler Clearance and Case Airflow
A large CPU air cooler can be an effective cooling solution, but choosing the right PC case requires more than matching the manufacturer's height specifications.
Start by confirming the cooler's complete installed dimensions.
Check whether tall RAM changes the front fan position, and verify clearance around motherboard heatsinks, case fans, and the side panel.
Next, evaluate the chassis airflow.
A spacious case with restrictive ventilation may not provide better cooling than a smaller case with a well-designed intake and exhaust path.
Finally, consider maintenance access and future component changes.
A successful installation should allow the cooler to operate without physical interference while providing enough airflow for the CPU's actual workload.
Explore the ACEGEEK PC case collection to compare cooler-height specifications, ventilation layouts, and hardware compatibility before choosing your next chassis.
The right case gives your CPU cooler enough room to fit properly and enough fresh air to perform effectively.