How to Configure Side Intake in a Panoramic PC Case
Side intake works.
But in a panoramic PC case, where the traditional mesh front has often been replaced by tempered glass, side intake fans become more than another row of RGB hardware: they may be the primary route through which room-temperature air reaches the GPU, CPU cooler, motherboard VRMs, memory, and radiator.
So why do so many builds configure them almost as an afterthought?
The basic configuration I recommend is straightforward: run the side fans as intake, use the rear fan as exhaust, use the rear portion of the top panel as exhaust, and add bottom intake when the GPU needs more direct airflow.
That is the starting point, not a universal law.
Modern panoramic PC case airflow is especially important because graphics-card power has moved far beyond the loads case layouts were dealing with a decade ago. NVIDIA lists the GeForce RTX 5090 Founders Edition at 575 W Total Graphics Power, with a 90°C maximum GPU temperature specification and a 1000 W recommended system power figure for its reference configuration. NVIDIA's official RTX 5090 specifications illustrate how much heat a modern high-end system may have to move through a glass-heavy chassis.
That changes the airflow discussion.
Why Side Intake Matters More in a Panoramic PC Case
A conventional tower normally pulls cool air through the front and pushes warm air toward the rear and roof.
A panoramic chassis often removes that front intake entirely.
The glass is there for a reason: visibility. But glass does not breathe.
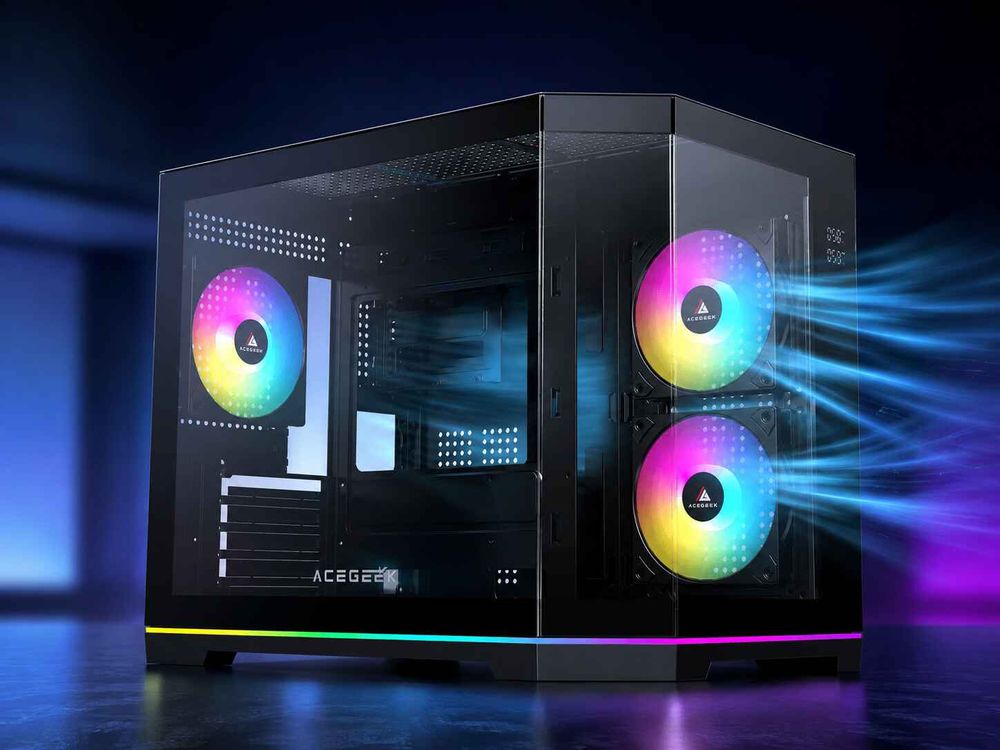
That leaves side and bottom openings doing most of the intake work. In practice, the side fan bank often becomes the panoramic case's functional equivalent of a conventional front intake.
Noctua's current airflow guidance specifically treats side-intake layouts found in cases such as the Lian Li O11 Dynamic and NZXT H6 Flow similarly to conventional front-intake layouts. Its recommendation is based on building a directed route between intake and exhaust rather than assigning fan direction simply according to whether the mounting position is physically at the front, side, top, or bottom. Noctua's airflow configuration guide explains the same principle.
Intel makes the broader point in its PC cooling guidance: component heatsinks can only move heat into the surrounding air; the chassis then has to remove that heated air before internal ambient temperature continues climbing.
This distinction matters.
Your GPU cooler does not cool the room inside your PC. It transfers GPU heat into it.
The case fans finish the job.
If you want more background on why glass cases must be judged by their actual intake geometry rather than appearance, ACEGEEK's guide to balancing aesthetics and cooling in tempered glass PC cases addresses that problem directly.
The Best Panoramic PC Case Fan Configuration
For most gaming systems using an air cooler or top-mounted AIO, I would start here:
Side: Intake
Bottom: Intake
Rear: Exhaust
Top-rear: Exhaust
Top-front: Test before automatically making it exhaust
Top-mounted radiator: Exhaust in most GPU-heavy gaming builds
The reason is simple: cool air enters close to the GPU and motherboard, crosses the component area, and leaves through the roof and rear.
But there is one mistake I see repeated constantly.
Builders fill every available top slot with high-speed exhaust fans.
More exhaust looks logical. It may not be.
A top-front exhaust positioned immediately above your side intake can remove freshly introduced air before that air reaches a tower CPU cooler. GamersNexus observed exactly this airflow interaction while experimenting with the HAVN HS 420: moving a top fan changed how much side-intake air actually reached the cooler.
Fan count is therefore not the same thing as cooling performance.
Recommended Starting Configurations
Hardware LayoutSide FansBottom FansRear FanTop FansPrimary GoalAir-cooled gaming PC3× intakeOptional intakeExhaustRear-top exhaustBalanced CPU/GPU coolingHigh-power GPU build3× intake2–3× intakeExhaust2–3× exhaustMaximum GPU fresh-air supplyTop-mounted AIO3× intake2–3× intakeExhaustRadiator exhaustRemove CPU heat from chassisSide-mounted AIORadiator intakeBottom intakeExhaustExhaustLowest CPU coolant temperatureQuiet gaming build2–3× low-RPM intakeOptionalExhaust1× rear-top exhaustLower fan RPM and noiseDisplay-focused vertical GPU3× intakeTest carefullyExhaustRear-top exhaustFeed vertical GPU without recirculation
These are starting configurations. Your GPU cooler orientation, dust filters, radiator thickness, vertical mounting bracket, desk clearance, and fan resistance can change the result.
Side Intake Fan Orientation: Make Sure the Fans Actually Pull Air In
This sounds embarrassingly basic.
It still causes problems.
On a conventional axial PC fan, air normally moves from the open blade side toward the side containing the frame supports, motor structure, and rear label. Intel also notes that the sticker, wires, grille, and support structure normally identify the exhaust side of a conventional fan.
For a standard side intake fan:
Room air → side ventilation → fan → PC interior
Do not rely entirely on aesthetics, though.
Reverse-blade RGB fans deliberately reverse the visual relationship so builders can show the clean blade face while maintaining intake airflow. If your panoramic case ships with reverse-blade fans, check the airflow arrows on the fan frame or the manufacturer's documentation.
A reversed fan bank can turn an apparently sensible build into:
Bottom intake → immediate side exhaust
At that point, much of your cool bottom air may leave the chassis before cooling anything meaningful.
Bad airflow loops can be remarkably efficient at cooling empty space.
Position Side Intake Fans Around the GPU, Not Around the RGB Pattern
Three side fans often look best when perfectly aligned.
Thermally, their jobs are not identical.
The lower side fan usually has the most direct relationship with the graphics card. The middle fan feeds the GPU zone, motherboard, and CPU region. The upper fan may supply a CPU tower cooler, RAM, VRM area, or top-mounted radiator.
That difference matters when tuning fan curves.
For a 3×120 mm side intake bank, I generally prefer keeping all three as intake but allowing the lower and middle fans to ramp more aggressively in a gaming-focused machine.
Why?
Because a modern gaming GPU may be dissipating several hundred watts while the CPU is using substantially less power.
A 575 W RTX 5090-class GPU makes this imbalance obvious.
If you are deciding between 120 mm and 140 mm fans, larger fans can often achieve a target airflow at lower rotational speed when the case supports them. Noctua likewise recommends using the largest fan diameter that fits a given mounting point as a general starting rule.
Real Testing Shows Why Side Intake Can Beat the Obvious Alternative
This is where airflow discussions become useful.
Theory is cheap.
GamersNexus tested eight fan configurations in the HAVN HS 420 rather than assuming one arrangement would win. Its six-fan testing showed a 4.6°C spread in GPU temperature between configurations. The best GPU result came from a horizontal GPU with side intake, while its best combined CPU/GPU configuration also used three side intake fans. The full HAVN HS 420 thermal analysis is worth reading because it demonstrates how much fan location alone can alter the result.
Another GamersNexus test makes the point even more forcefully.
In the TRYX LUCA L70, standardized side intake produced a GPU average of roughly 42°C above ambient, with memory junction at 48°C and hotspot at 55°C above ambient. Moving the intake fans to the more restricted bottom position pushed those values to approximately 47°C, 55°C, and 62°C above ambient respectively. GamersNexus' LUCA L70 testing attributed much of that difference to the restrictive bottom intake geometry.
Five degrees on GPU average.
Seven degrees on hotspot.
Same basic fan hardware.
That is why I dislike advice that says, "bottom intake is always best because the GPU is above it."
Air must actually get through the opening.
A side intake with a large mesh area can outperform a theoretically perfect intake placed behind a restrictive filter, thick grille, solid structural panel, or inadequate floor clearance.
Static Pressure Matters When the Side Intake Is Restricted
Do not shop using CFM alone.
A fan rated for impressive free-air airflow can lose much of that performance when installed behind a filter, fine mesh, narrow side opening, radiator, or decorative panel.
That is where static pressure becomes relevant.
ACEGEEK's guide to airflow fans versus static-pressure fans explains why a side intake behind restrictive glass-adjacent ventilation may benefit from a balanced or pressure-oriented fan rather than a model selected only for maximum free-air CFM.
I would think about side intake resistance in three rough levels:
Low Restriction
Large perforated side panel, open mesh, minimal filter resistance.
Use a balanced high-airflow fan.
Medium Restriction
Mesh plus removable dust filter, limited panel clearance, moderate grille density.
A balanced fan with respectable static pressure is safer.
High Restriction
Radiator, dense filter, narrow slots, overlapping structural rails, or a panel positioned close to the fan.
Prioritize useful static pressure across normal operating RPM.
And remember: a stronger fan cannot fix a wall.
Side Intake with Bottom Intake: Usually Good, Sometimes Redundant
Combining side and bottom intake is common in panoramic case cooling.
I like it for GPU-heavy builds.
Side fans introduce cool air across the main chamber while bottom fans feed air directly toward the graphics card.
But adding three bottom fans does not automatically produce three fans' worth of extra cooling.
Their performance depends on:
Clearance underneath the case
Desk or carpet obstruction
Filter resistance
PSU chamber geometry
GPU distance from the fan
GPU fan orientation
Fan RPM
Exhaust capacity
The LUCA L70 data is a useful warning: its bottom location performed worse than side intake because the path itself was restrictive.
So I would configure side intake first.
Measure.
Then add bottom intake and test again.
That approach costs twenty minutes and can save you from buying three fans that mostly illuminate your desk.
Should a Side-Mounted AIO Be Intake or Exhaust?
For CPU temperature, side radiator intake is usually the stronger starting point.
It lets the radiator use room-temperature air instead of air already warmed by the GPU.
But there is a trade.
The radiator then dumps CPU heat inside the case.
Noctua recommends pairing a front- or side-mounted intake radiator with top and rear exhaust fans so the heated radiator air can leave the chassis efficiently. Its guidance also notes that top-mounted exhaust radiators tend to favor GPU temperature, while front or side intake radiators generally favor CPU temperature.
ACEGEEK covers this decision in more depth in Top vs Side Radiator in a Panoramic PC Case and Radiator Intake vs Exhaust: How to Balance CPU and GPU Temperatures.
For gaming systems with a 300–575 W GPU, I generally prefer:
Side intake fans + bottom intake + top AIO exhaust + rear exhaust.
For sustained CPU rendering where processor temperature matters more:
Side AIO intake + bottom intake + top exhaust + rear exhaust.
Different workload. Different answer.
Do Not Chase Perfect Positive Pressure by Counting Fans
Three intake fans and three exhaust fans do not automatically produce neutral pressure.
And four intake fans versus three exhaust fans do not automatically produce positive pressure.
Fan size, RPM, filters, radiators, grille restriction, fan curves, and pressure-flow characteristics all matter.
Noctua defines positive pressure as a state where more air is being pulled into the case than expelled; negative pressure is the reverse. Its guidance also notes that positive pressure can reduce unfiltered dust ingress, whereas negative pressure can pull air through gaps and unfiltered openings.
For a panoramic gaming PC, I usually aim for slightly intake-biased airflow, not extreme positive pressure.
For example:
Side intake: 3×120 mm at 900 RPM
Bottom intake: 3×120 mm at 800 RPM
Top exhaust: 3×120 mm at 700 RPM
Rear exhaust: 1×120 mm at 700 RPM
Those RPM figures are examples, not universal targets.
Filters and radiators can completely change effective airflow.
The correct pressure balance is the one that keeps temperatures, noise, and dust behavior acceptable in your finished machine.
Fan Curves Are More Important Than Maximum RPM
Running every side intake fan at 100% is not tuning.
It is surrender.
Higher airflow tends to require more fan speed or more fans, and higher speed usually increases noise. Noctua recommends setting temperature-responsive fan curves after the system has been assembled rather than treating maximum RPM as the normal operating condition.
A reasonable starting profile for PWM side intake fans might look like this:
Load StateSuggested Side Intake SpeedIdle / desktop25–35%Light work35–45%Moderate gaming50–65%Heavy gaming65–80%Thermal stress testing80–100%
I prefer linking GPU-focused intake fans to GPU temperature where the motherboard, fan controller, or control software permits it.
Why make three GPU-feeding fans race to 1,500 RPM because the CPU briefly opened a browser tab?
That is bad control logic.
Common Panoramic PC Case Airflow Mistakes
Turning the Side Fans into Exhaust
This often removes fresh air before the CPU and GPU can use it.
Making Every Top Fan Exhaust
The forward top exhaust can steal side-intake air before it reaches a tower cooler.
Choosing Fans by CFM Alone
Restricted intakes require attention to pressure as well as free-air airflow.
Ignoring the Dust Filter
A clean filter and a dirty filter are effectively two different airflow systems.
Installing Bottom Intake on Carpet
A 120 mm fan cannot pull meaningful air through a floor.
Using a Side Intake Radiator Without Enough Exhaust
The CPU may look great while GPU and motherboard ambient temperatures climb.
Assuming More Fans Mean Better Cooling
The HAVN HS 420 testing showed that configuration changes alone produced a 4.6°C GPU spread even within the same chassis.
Before building, ACEGEEK's 10 Things to Know Before Building in a Panoramic PC Case is a useful companion because radiator clearance, GPU position, cabling, and fan placement all interact once the machine is assembled.
How I Would Test the Final PC Case Airflow Setup
Do not finish the build after the fans spin.
Finish it after the temperatures make sense.
Use the same room conditions and test at least three configurations.
Configuration A
Side intake + rear exhaust + top exhaust.
Configuration B
Side intake + bottom intake + rear exhaust + top exhaust.
Configuration C
Same as B, but reduce top-front exhaust speed or disable that fan.
Then run the same sustained workload for each configuration.
Record:
Room temperature
GPU core temperature
GPU hotspot
GPU memory temperature if available
CPU package temperature
CPU power
GPU power
Fan RPM
SSD temperature
Noise level if you can measure it
Use temperature over ambient when possible.
A GPU at 70°C in a 30°C room is operating 40°C above ambient. A GPU at 66°C in a 22°C room is actually 44°C above ambient.
The second number looks better on a screenshot.
It is not the better thermal result.
FAQs
What is the best side intake fan orientation in a panoramic PC case?
The best side intake fan orientation in most panoramic PC cases is to pull cool outside air through the side ventilation and push it into the main component chamber, where the air can feed the GPU, CPU cooler, motherboard, and memory before leaving through rear and top exhaust positions.
With conventional fans, this normally means the open blade face points toward the outside ventilation and the support-frame side faces the components. Reverse-blade fans may look different, so always verify their airflow arrows.
How many side intake fans should I use in a panoramic PC case?
Three 120 mm side intake fans are a strong starting configuration for panoramic gaming cases that provide a full-height side mounting rail, while two 140 mm fans can also work well when supported because larger blades may deliver the required airflow at lower rotational speeds and potentially lower noise.
The right number depends on side vent area, GPU heat output, fan size, filter resistance, and available exhaust. Do not add fans simply to fill every mounting hole.
Should I use both side intake and bottom intake fans?
Using both side and bottom intake fans is often effective in a high-performance panoramic PC because the side bank supplies fresh air across the motherboard chamber while the bottom bank can feed the graphics card directly, but the benefit depends heavily on ventilation area, filter restriction, and clearance beneath the chassis.
Test the side intake by itself first and then measure the effect of the bottom fans. Restricted bottom panels can perform worse than an open side intake even when they sit closer to the GPU.
Is positive pressure better for a panoramic PC case?
Slight positive pressure is often a useful target for a panoramic PC case because intake airflow modestly exceeds exhaust airflow, helping cool outside air enter through filtered fan positions rather than allowing negative pressure to draw dust through unfiltered panel gaps, cable openings, and other small chassis seams.
Do not determine pressure by fan count alone. RPM, filter resistance, radiator restriction, fan size, and fan design all affect actual airflow.
Should a side-mounted radiator be intake or exhaust?
A side-mounted radiator is generally configured as intake when lower CPU and coolant temperatures are the priority because it receives cool room air directly, while a top-mounted exhaust radiator is often preferred in GPU-heavy gaming systems because it sends CPU heat outside rather than releasing radiator-heated air into the graphics-card chamber.
If you use a side radiator as intake, pair it with effective top and rear exhaust so that warmed radiator air does not remain inside the case.
What is the best fan setup for a panoramic PC case?
The best fan setup for many panoramic gaming PCs uses side intake fans, optional bottom intake fans, rear exhaust, and top exhaust, creating a directed airflow path that supplies cool outside air to the graphics card and motherboard before moving heated air toward the rear and roof of the chassis.
For a top-mounted AIO, I would normally keep the radiator as exhaust. For a CPU-focused side-mounted AIO, radiator intake may be preferable.
How should I set the fan curve for side intake fans?
A good side intake fan curve keeps RPM low during idle and light workloads, then progressively increases airflow as CPU or preferably GPU temperature rises, allowing the case to deliver substantial cooling during sustained gaming without forcing every intake fan to operate at maximum speed during ordinary desktop use.
Start conservatively, run repeatable workloads, and tune from measured temperatures rather than copying somebody else's RPM values. Noctua similarly recommends adjusting fan curves after the final system has been assembled.
Configure the Airflow Before You Configure the Lighting
A panoramic PC case should not have to choose between visibility and cooling.
But it does require planning.
Start with side intake, rear exhaust, and controlled top exhaust. Add bottom intake when the GPU benefits from it. Match the fan to the resistance of the intake. Avoid excessive top-front exhaust. And test the finished machine under the workload it will actually run.
Most importantly, stop judging panoramic PC case airflow by fan count.
Judge it by air path.
If you are planning a new panoramic gaming build, compare your GPU position, radiator location, fan sizes, side ventilation, bottom clearance, and exhaust layout before buying the final cooling hardware. Then use measured CPU and GPU temperatures to tune the side intake fans rather than relying on a generic diagram.
Explore ACEGEEK's PC case guides and case options, map out your airflow configuration first, and build the cooling system around the heat your hardware actually produces—not around the empty fan mounts the chassis happens to provide.