Top vs Side Radiator in a Panoramic PC Case: Which Setup Works Best?
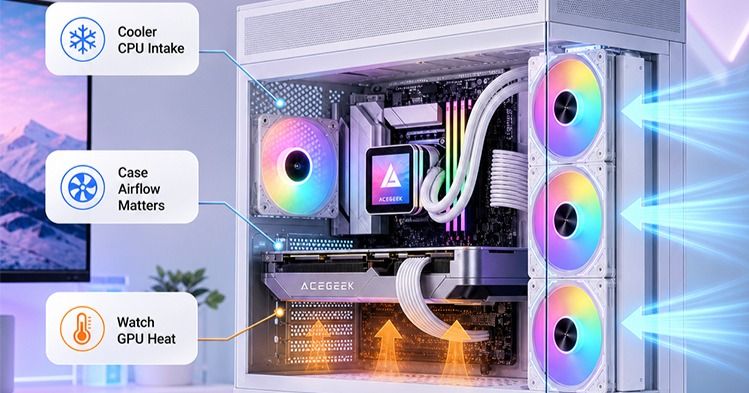
A panoramic PC case gives you multiple ways to display your cooling hardware. With glass panels, side-mounted fans, and spacious dual-chamber layouts, both top and side radiator installations can look impressive.
But radiator placement affects more than appearance.
A top-mounted AIO radiator typically removes CPU heat through the roof of the case. A side-mounted intake radiator receives cooler outside air but releases the heat it absorbs into the main chamber.
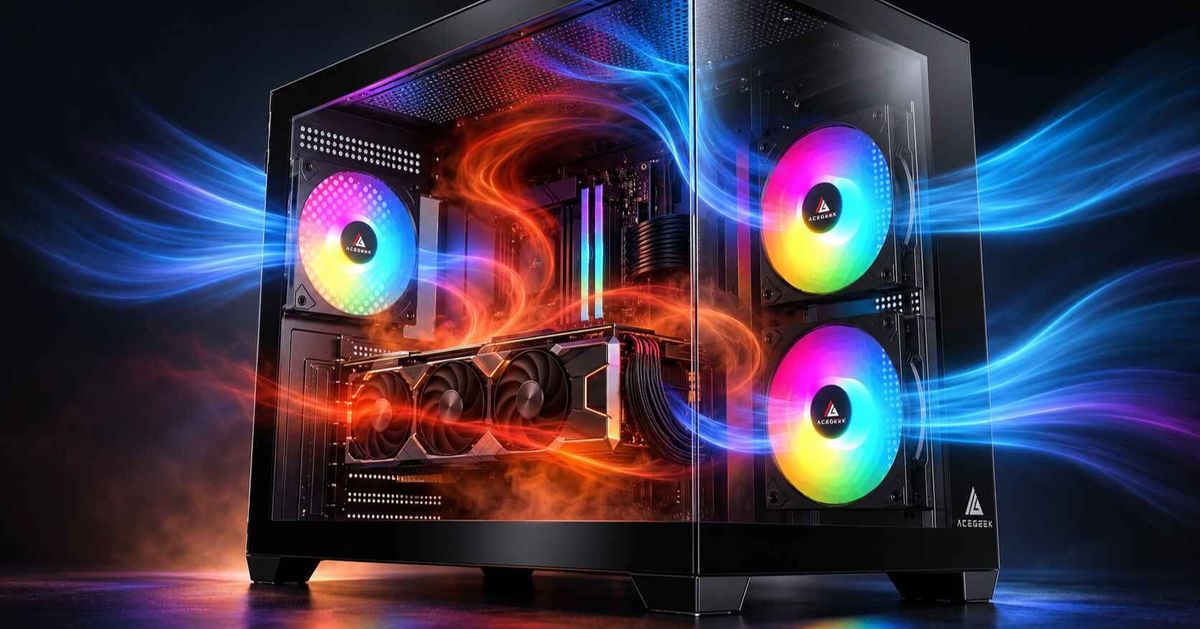
That difference can influence CPU temperatures, GPU cooling, fan noise, and overall airflow.
For many GPU-focused gaming builds, top-mounted radiator exhaust is a practical starting point. For sustained CPU-intensive workloads, side-mounted radiator intake may offer better CPU cooling.
However, the ideal configuration depends on your case, hardware, and cooling requirements.
This guide compares top vs side radiator placement in panoramic PC cases and explains how to choose a layout that balances thermal performance, installation clearance, and long-term reliability.
Top vs Side Radiator: What Is the Main Difference?
The biggest difference is the temperature of the air entering the radiator and where the resulting heat goes.
An AIO liquid cooler transfers heat from the CPU through the cold plate and coolant to the radiator.
Fans then move air through the radiator fins to carry that heat away.
Radiator placement determines how this airflow interacts with the rest of the PC.
Top-Mounted AIO Radiator as Exhaust
A top-mounted exhaust radiator moves air from inside the case through the radiator and out of the top ventilation openings.
The airflow path is:
Case Interior → Radiator → Outside Air
This arrangement helps remove CPU heat directly from the chassis.
It also allows side or bottom intake fans to supply fresh air to the GPU without forcing that air through the CPU radiator first.
However, the radiator may receive air that has already been warmed by the graphics card.
As a result, CPU or coolant temperatures can be slightly higher than with a radiator receiving outside air directly.
Side-Mounted AIO Radiator as Intake
A side-mounted intake radiator draws outside air through the side ventilation openings and radiator before releasing it into the main chamber.
The airflow path is:
Outside Air → Side Radiator → Case Interior
This configuration gives the radiator access to relatively cool external air.
That can improve heat transfer from the coolant and reduce CPU temperatures under sustained load.
The trade-off is that radiator-heated air enters the case.
If the graphics card uses that warmed air for cooling, its temperature or fan speed may increase.
A separate bottom intake path can help reduce this effect by supplying additional fresh air directly to the GPU.
Top vs Side Radiator Comparison
FeatureTop Radiator ExhaustSide Radiator IntakeRadiator inlet airInternal case airOutside airCPU cooling tendencyMay run slightly warmerOften benefits from cooler inlet airGPU cooling tendencyAvoids adding radiator heat to case intakeMay warm GPU intake airMain airflow directionUpward and outSideways into main chamberUseful starting applicationGPU-heavy gamingSustained CPU workloadsInstallation concernsRAM, VRM heatsinks, EPS cablesSide chamber depth, tubing, GPU spaceTypical supporting fansSide/bottom intakeBottom intake, top/rear exhaustDust managementDepends on intake filteringSide radiator/filter may require regular cleaning
These are typical tendencies rather than guaranteed temperature results.
Fan speed, case geometry, radiator design, and other ventilation paths can change the outcome.
Why Does Radiator Placement Matter More in Panoramic Cases?
Traditional mesh-front PC cases commonly use front intake and rear exhaust fans.
Panoramic cases often use glass front and side panels, moving the main ventilation openings to the side, bottom, or top.
This changes how fresh air reaches internal components.
In a typical panoramic layout:
Side ventilation supplies air to the component chamber.
Bottom intake supports GPU cooling.
Top ventilation removes heated air.
Rear exhaust helps move warm air away from the CPU and motherboard.
When an AIO radiator occupies the side intake position, some or all of the air entering that area passes through radiator fins.
The radiator adds airflow resistance and transfers CPU heat into the incoming air.
When the radiator is mounted at the top as exhaust, the side intake positions can remain available for direct case ventilation.
Why GPU Airflow Deserves Attention
Modern open-air graphics cards draw air through their heatsinks and release much of the resulting heat into the case interior.
A high-performance GPU can therefore create significant sustained heat during gaming.
If the graphics card receives air already warmed by a side intake radiator, its cooling system may need to operate at a higher fan speed.
However, a panoramic case with effective bottom intake can provide the GPU with a separate supply of fresh air.
This may reduce the temperature penalty associated with a side radiator.
The important factor is not simply the radiator location.
It is whether the CPU cooling system and graphics card compete for the same incoming airflow.
For a practical explanation of fan direction and side ventilation, see our guide to configuring side intake fans in a panoramic PC case.
What Does Real Testing Tell Us About Radiator Placement?
Radiator placement affects cooling performance, but the results are highly dependent on the complete system.
Noctua has published controlled testing comparing different radiator locations using its NL-LC1-36 liquid cooler.
Its test system included:
Intel Core Ultra 9 285K operating at 250W.
ASUS GeForce RTX 5080 Noctua Edition operating at 360W.
Antec Flux Pro Noctua Edition chassis.
Comparable radiator configurations.
In this specific test, front-mounted radiator intake produced approximately 3°C lower CPU temperatures than top mounting.
Top mounting provided approximately a 1°C improvement in GPU temperature.
Source: Noctua — Where Should I Install My AIO Radiator?
These results are useful because they demonstrate the different priorities of radiator placement.
However, the test compared front and top mounting in a specific airflow-oriented chassis, not every possible side and top configuration in a panoramic case.
Noctua also notes that the tested case provided additional fresh airflow toward the GPU, helping limit the GPU temperature difference.
In a case without that additional intake path, the result could be different.
The practical lesson is to evaluate radiator placement using both CPU and GPU temperatures instead of judging success from CPU temperature alone.
Which Radiator Layout Is Best for Your Workload?
A useful way to choose between top and side mounting is to consider which component generates the most sustained heat during your typical workload.
Gaming PC: Start With Top Radiator Exhaust
For many gaming-focused panoramic builds, top radiator exhaust is a sensible starting configuration.
A practical airflow arrangement is:
Side fans: Intake.
Bottom fans: Intake, where supported.
Top radiator fans: Exhaust.
Rear fan: Exhaust, where supported.
This arrangement allows side and bottom fans to supply outside air while the AIO releases CPU heat through the roof.
It can be particularly useful when the graphics card generates substantial heat during long gaming sessions.
However, the top radiator still needs sufficient airflow.
If the top panel is restrictive or the radiator receives very warm internal air, CPU cooling performance may suffer.
The goal is to find a configuration that keeps both CPU and GPU temperatures within their intended operating ranges.
CPU Rendering and Productivity: Consider Side Radiator Intake
For sustained processor workloads, side radiator intake can be an attractive option.
Examples include:
CPU rendering.
Video encoding.
Large software compilation tasks.
Scientific calculations.
Processor-intensive simulations.
These workloads can keep CPU package power elevated for extended periods.
Supplying the radiator with outside air may help maintain lower coolant and CPU temperatures.
However, the warmed radiator air still needs an effective exit path.
Top and rear exhaust fans can help remove that heat.
If the system also contains a powerful GPU, additional bottom intake may help provide cooler air to the graphics card.
Mixed CPU and GPU Workloads: Compare Both Configurations
Some workstations regularly place heavy loads on both the processor and graphics card.
In these situations, neither radiator location can be declared the best option without considering the full cooling arrangement.
A side intake radiator may lower CPU temperature while increasing the thermal load on the GPU cooling system.
A top exhaust radiator may provide a better balance for the entire chassis, but its cooling capacity must still be sufficient for the CPU.
Use repeatable combined workloads and compare sustained temperatures, fan speeds, and performance.
Recommended Starting Layouts
Main WorkloadRadiator Starting PositionSupporting AirflowGPU-focused gamingTop exhaustSide and bottom intakeCPU renderingSide intakeBottom intake, top and rear exhaustBalanced gaming and productivityTop exhaustSide/bottom intakeMixed CPU and GPU renderingCompare bothPrioritize GPU intake and reliable exhaustCompact panoramic buildPosition with verified clearanceMatch airflow to available vents
These configurations are starting points for testing, not fixed installation rules.
Can You Use a Side-Mounted Radiator as Exhaust?
Yes.
A side-mounted AIO radiator can operate as exhaust when the case provides an appropriate airflow path.
In this configuration, the fans draw air from the main chamber through the radiator and release it outside through the side ventilation.
This avoids introducing radiator-heated air into the case interior.
However, the radiator receives internal air that may already be warm.
CPU cooling performance may therefore be lower than with side intake under comparable airflow conditions.
When Side Exhaust Makes Sense
Side exhaust may be useful when:
The GPU receives sufficient fresh air from bottom or front intake.
The case provides effective ventilation through the side panel.
The top mounting position is unavailable.
The cooling configuration benefits from removing CPU heat directly outside.
The main concern is ensuring sufficient replacement intake airflow.
For example, a case using side radiator exhaust, top exhaust, and rear exhaust may depend heavily on bottom intake.
If the bottom ventilation is restrictive, the available fresh-air supply may be insufficient.
Do not estimate the pressure balance using fan counts alone.
Radiator fins, filters, ventilation openings, and fan speed all affect actual airflow.
For a broader explanation of airflow direction, read our guide to radiator intake vs exhaust and CPU/GPU temperature balance.
How to Check Top Radiator Clearance Before Buying
A PC case may advertise support for a 360mm top radiator without accommodating every 360mm AIO.
Radiator length only describes one part of the installation.
The complete cooling assembly includes the radiator, fans, fittings, and mounting hardware.
Calculate the Radiator and Fan Thickness
Consider a hypothetical AIO with:
Radiator thickness: 27mm.
Fan thickness: 25mm.
The nominal combined thickness is:
27mm + 25mm = 52mm
A thicker radiator measuring 38mm combined with the same fans creates:
38mm + 25mm = 63mm
The additional 11mm can affect compatibility with motherboard components.
However, the entire assembly depth does not necessarily overlap the motherboard area.
Some cases use offset mounting brackets that provide extra clearance beside the RAM slots.
The exact geometry matters.
Check Common Top-Mounting Conflicts
Potential obstructions include:
RAM Modules
Tall memory heat spreaders can interfere with radiator fans, particularly when the top mount sits directly above the DIMM slots.
Motherboard VRM Heatsinks
Large heatsinks near the CPU socket can occupy part of the radiator installation area.
CPU Power Cables
EPS power connectors and cables near the motherboard's upper edge may require additional routing space.
Rear Exhaust Fan
Radiator end tanks, fittings, or tubes may interfere with a rear exhaust fan.
Radiator Tube Routing
The tubes must reach the CPU block without excessive tension, sharp bends, or contact with moving fans.
Before purchasing, check the case manual and the exact radiator dimensions.
Our guide to top-radiator clearance for RAM, tubes, and motherboard components explains these installation conflicts in greater detail.
What Should You Check Before Side-Mounting an AIO?
Side mounting avoids some top-clearance problems but introduces its own compatibility requirements.
Side Radiator Thickness
The case must provide sufficient room for the complete radiator-and-fan assembly.
In some dual-chamber cases, part of the radiator or fan assembly can occupy the rear utility compartment.
In others, the entire assembly extends into the main chamber.
Do not assume that advertised side radiator support guarantees compatibility with every radiator thickness.
GPU Clearance and Cable Routing
A side radiator may sit near the graphics card or its power cable.
Check that the radiator, fans, and tubes do not obstruct the GPU cooler or interfere with its power connection.
A visually clean side-mounted installation should not require forcing the tubing around another component.
Side Panel Ventilation
The radiator needs an adequate airflow path.
A restrictive side panel or dense filter can reduce fan performance.
The number of side fan mounting positions alone does not establish how much air the radiator can move.
Access for Maintenance
Consider how easily the radiator and fans can be cleaned after installation.
Dust filters should remain accessible.
The radiator should also be removable without unnecessary stress on the tubing or adjacent hardware.
Real Case Example: ACEGEEK Mercury R425 (Pro)
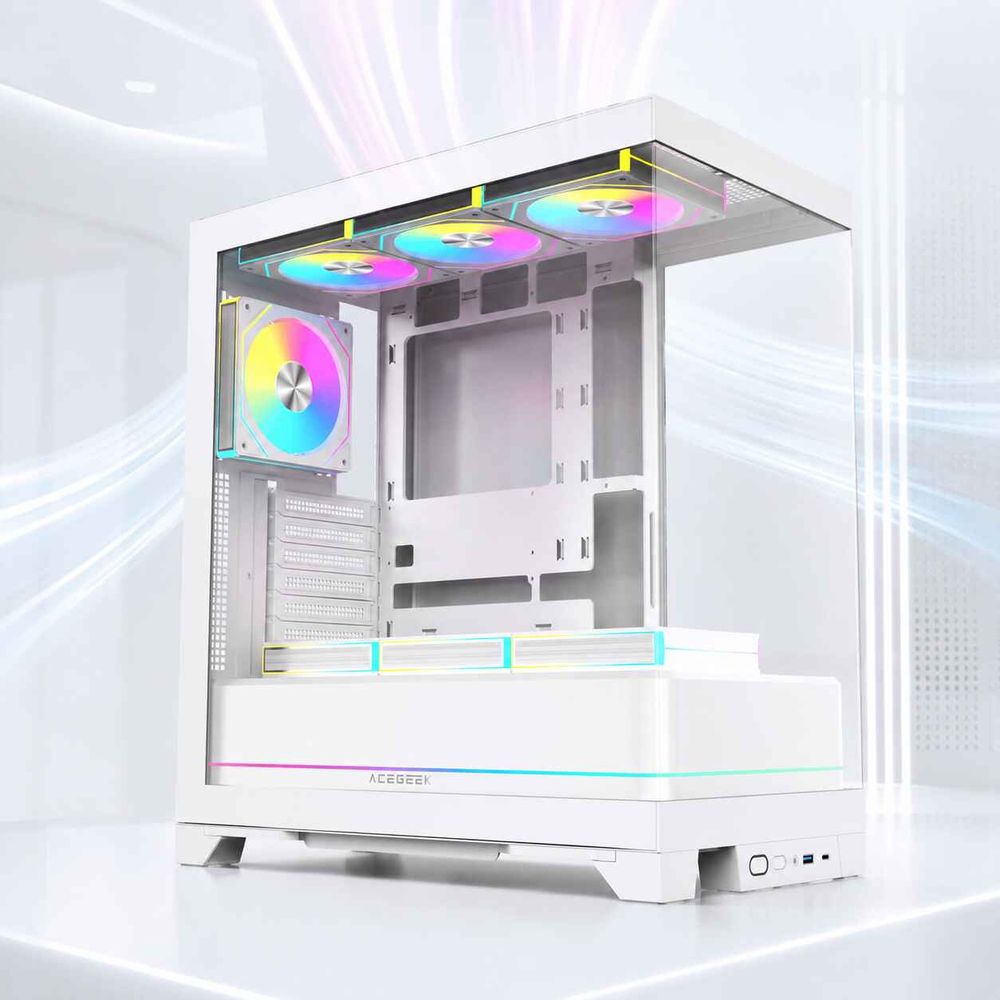
The ACEGEEK Mercury R425 (Pro) provides a useful example of a panoramic-style case supporting multiple radiator locations.
Its published specifications include:
SpecificationACEGEEK Mercury R425 (Pro)Case dimensions425 × 280 × 420mmMotherboard supportATX / M-ATX / ITXMaximum GPU clearance410mmMaximum CPU cooler clearance165mmTop radiator support360mm AIOSide radiator support360mm AIOTop fan support3 × 120mmSide fan support3 × 120mmBottom fan support3 × 120mmRear fan support1 × 120mm
These specifications provide the opportunity to plan different radiator and airflow configurations.
For example:
Gaming-Focused Configuration
A top-mounted 360mm AIO can operate as exhaust, while side and bottom fans provide intake airflow.
CPU-Focused Configuration
A side-mounted 360mm AIO can operate as intake, with top and rear fans handling exhaust airflow.
Both arrangements are possible starting points based on the listed mounting positions.
However, the specifications do not guarantee that every AIO radiator, GPU, motherboard, and fan combination will fit simultaneously.
Actual compatibility still depends on radiator thickness, fan dimensions, tube routing, and surrounding component clearance.
Similarly, the specifications alone do not establish which configuration produces lower temperatures.
The important advantage is having more than one potential cooling layout to evaluate.
Does AIO Tube Orientation Matter for Top and Side Mounting?
Yes.
Radiator placement affects not only airflow but also where small amounts of air inside a sealed liquid-cooling loop may accumulate.
Many conventional AIOs use a pump integrated into the CPU cooling block.
For these systems, the radiator's highest point should generally remain above the pump to reduce the likelihood of air collecting inside the pump.
However, some liquid coolers use different pump locations.
Always follow the installation requirements for the exact model.
Top-Mounted Radiator
A top-mounted radiator usually places the radiator above the CPU-mounted pump.
This makes it a common, practical configuration for conventional AIO designs.
The tubing should follow a natural path without sharp bends or interference with surrounding components.
Side-Mounted Radiator
A vertically mounted side radiator can also work safely.
For conventional CPU-block pump AIOs, the top of the radiator should remain higher than the pump.
Where practical, positioning the radiator tube connections at the bottom can help keep accumulated air away from those connections.
However, tubes-up installation is not automatically unsafe when the radiator's highest point remains above the pump and the manufacturer permits the arrangement.
Corsair's official AIO mounting guide explains these considerations.
Avoid Unsupported Bottom Radiator Installations
Bottom mounting is generally unsuitable for conventional AIO designs with a pump integrated into the CPU block because the pump may become the highest point in the cooling loop.
This can encourage air accumulation at the pump, potentially increasing noise and affecting cooling reliability.
Some specialized cooling systems use different pump placements, so their instructions may differ.
Do not assume that a case's bottom radiator mounting holes automatically make bottom mounting appropriate for every AIO.
How Should You Configure Radiator Fan Speed?
After choosing radiator placement, fan control can help improve cooling stability and noise.
AIO radiator fans do not necessarily need to react aggressively to every short CPU temperature spike.
Modern processors can experience rapid temperature changes during boost workloads, while coolant temperature changes more gradually.
When an AIO includes a reliable coolant temperature sensor and a compatible controller, coolant-based radiator fan control may provide smoother behavior.
CPU temperature should still be monitored for thermal safety.
Top Exhaust Configuration
For a top-mounted exhaust radiator, consider using coolant-temperature-based fan control where supported.
Side and bottom intake fans can respond to GPU temperature or another appropriate supported sensor.
This allows GPU airflow to increase during graphics-intensive workloads.
Side Intake Configuration
For a side-mounted intake radiator, the radiator fans primarily respond to CPU cooling-loop demand.
Bottom intake fans may be controlled separately according to GPU cooling requirements.
Top and rear exhaust fans should provide an effective route for removing warm air.
However, not every motherboard or AIO controller supports all temperature sensors.
Start with manufacturer-approved settings and test the actual cooling result.
For additional guidance, see our article on coolant temperature vs CPU temperature for AIO fan control.
How to Test Top vs Side Radiator Performance
The most reliable way to choose between radiator locations is to measure the performance of your actual PC.
A configuration that performs well in one panoramic case may behave differently in another.
Step 1: Record a Baseline
Before changing radiator position, record the cooling system's current behavior.
Useful measurements include:
MeasurementPurposeCPU package temperatureEvaluate processor coolingCPU package powerConfirm comparable CPU workloadsGPU core temperatureEvaluate graphics-card coolingGPU hotspot temperatureDetect changes in GPU hotspot behaviorGPU power consumptionConfirm comparable GPU workloadsCoolant temperatureMonitor the AIO loop where supportedRadiator fan RPMCheck fan operationPump RPMVerify cooling-loop operationRoom temperatureAccount for ambient conditionsSystem noiseEvaluate acoustic trade-offs
Step 2: Use Repeatable Workloads
Test the system under three types of workloads:
CPU-Heavy Test
Use a sustained CPU-intensive workload to evaluate radiator performance.
GPU-Heavy Test
Use a repeatable game benchmark or graphics workload to evaluate how the radiator layout affects GPU cooling.
Combined Workload
Run a suitable workload that exercises both the CPU and GPU.
This is especially important because a configuration that performs well under CPU-only load may behave differently when the graphics card also produces significant heat.
Allow sufficient time for temperatures to approach stable operating conditions.
Step 3: Keep Other Settings Consistent
Use the same CPU and GPU power settings, pump mode, and comparable fan-speed settings wherever possible.
Keep the side panels and dust filters installed.
If you move the radiator from the side to the top, recognize that the comparison changes both radiator location and its surrounding airflow.
The result represents a comparison of complete configurations, not a perfect isolation of one variable.
Step 4: Evaluate the Entire System
Do not judge the result only by the lowest CPU temperature.
Consider whether the new configuration:
Maintains acceptable CPU temperatures.
Provides sufficient GPU cooling.
Reduces thermal throttling.
Avoids unnecessary fan noise.
Maintains stable pump operation.
Keeps surrounding components within their specified operating limits.
For example, a side intake radiator may reduce CPU temperature while increasing GPU fan speed.
A top exhaust radiator may produce a slightly warmer CPU but a quieter overall gaming system.
Neither outcome is automatically better.
Choose according to the workload and the component behavior that matters most.
Frequently Asked Questions
1. Can I Use a Side-Mounted AIO Radiator as Exhaust?
Yes.
A side-mounted AIO radiator can operate as exhaust when the case has sufficient replacement intake airflow.
This arrangement removes CPU radiator heat directly from the chassis rather than releasing it into the main chamber.
However, the radiator uses warmer internal air, which may increase CPU or coolant temperature compared with side intake.
Check whether bottom or other intake fans can supply adequate fresh air before choosing this configuration.
2. Why Did My GPU Fans Get Louder After Moving the Radiator to the Side?
If the radiator is configured as side intake, it releases CPU-heated air into the main chamber.
That warmer air may reach the graphics card, causing the GPU cooling fans to increase speed.
However, fan noise can also change because of GPU power consumption, fan curves, or different case airflow patterns.
Compare GPU power, core temperature, hotspot temperature, and fan RPM before and after the change.
If the GPU consistently receives warmer air, improving bottom intake or reconsidering radiator placement may help.
3. What If My Top Radiator Fits but Interferes With RAM or VRM Heatsinks?
A case may support the radiator's mounting length while lacking sufficient clearance for the complete assembly.
The radiator, fans, fittings, and mounting hardware can interfere with memory modules, motherboard heatsinks, or CPU power cables.
Do not force the components into place.
Check whether the case supports an offset mounting position, a thinner compatible radiator, or an alternative installation location.
Side mounting may be a practical solution if the case supports the intended AIO and the tubing can be routed safely.
4. Are Tubes-Up Side-Mounted AIO Radiators Unsafe?
Not necessarily.
For a conventional AIO with its pump in the CPU block, the important consideration is keeping the radiator's highest point above the pump.
Tubes-down is often preferred for a vertical radiator because it helps keep accumulated air away from the tube connections.
However, tubes-up can be acceptable when the manufacturer supports the arrangement and the radiator remains positioned appropriately relative to the pump.
Always follow the exact cooler's instructions, particularly for models with pumps located outside the CPU block.
5. Should I Change Radiator Placement If My CPU and GPU Temperatures Are Already Good?
Usually, there is little reason to relocate a correctly installed radiator if the system already provides stable performance, acceptable temperatures, and reasonable noise.
Changing the radiator position can introduce new compatibility challenges and alter the balance between CPU and GPU cooling.
A different layout may offer a small temperature improvement, but that does not automatically make it worthwhile.
Consider relocation when testing identifies a meaningful cooling limitation, unacceptable noise, or an installation problem that another supported position could resolve.
Choose the Radiator Position That Fits Your Cooling Priorities
Top and side radiator mounting can both provide effective cooling in a panoramic PC case.
A top-mounted exhaust radiator is often a sensible choice for GPU-focused gaming systems because it removes CPU heat directly from the chassis.
A side-mounted intake radiator can provide cooler air to the CPU cooling loop, making it attractive for sustained processor-intensive workloads.
However, neither arrangement guarantees better temperatures or quieter operation in every system.
The correct choice depends on the case's ventilation design, available radiator clearance, GPU airflow, fan settings, and actual workload.
Before installing your AIO, confirm the radiator dimensions, tubing path, motherboard clearance, and pump placement requirements.
Then configure the case fans to create an effective intake and exhaust path.
If both radiator positions are supported, use controlled testing to evaluate their performance rather than relying only on appearance or general recommendations.
The best radiator placement is the one that provides reliable cooling for your entire PC—not simply the lowest temperature on a single sensor.