Back-Connect PC Case Buying Guide: Ports, Cabling, and Compatibility
Cables moved backward.
That sounds almost laughably simple, yet once motherboard power, CPU power, USB headers, fan headers, SATA connections, ARGB leads, front-panel pins, and sometimes GPU power disappear behind the motherboard tray, the case stops being a passive metal box and becomes part of the motherboard interface itself.
So why are buyers still shopping for a back-connect PC case as if it were just another panoramic chassis with cleaner cable management?
I would not.
The hard truth is that back-connect cases remove one old problem and create a new one. You gain an unusually clean main chamber. But you also become much more dependent on motherboard layout, tray cutouts, rear cable depth, panel clearance, front I/O routing, and ecosystem compatibility.
ASUS calls its hidden-connector system BTF, MSI uses Project Zero, and GIGABYTE uses Project STEALTH. All three move major connectors toward the rear of the motherboard, but that does not make every motherboard interchangeable with every reverse-connector case. ASUS itself warns that BTF motherboards are compatible with specific case models, while MSI describes Project Zero as a system built around back-connect motherboards and compatible PZ cases.
That distinction should control your entire buying decision.
What a Back-Connect PC Case Actually Changes
A back-connect PC case is a chassis designed with motherboard-tray openings and rear-side installation space that allow compatible motherboards to place major power, USB, fan, storage, audio, and front-panel connectors on the back side instead of exposing them inside the main component chamber.
The visual improvement is obvious.
The compatibility consequences are not.
On a conventional ATX or Micro-ATX motherboard, the 24-pin ATX power socket usually sits along the right edge. CPU EPS power sits near the top. USB, front-panel, fan, SATA, and ARGB headers are spread around the visible face or edges of the PCB.
A rear connector motherboard moves many of those sockets behind the board.
That means your case needs physical openings in exactly the areas where those connectors sit.
No opening? No connection.
An opening that is 15 mm too far away? You may still have a problem.
A shallow rear chamber? The connector fits, but now the cable pushes against the side panel.
That is why I recommend treating ACEGEEK's full PC part compatibility guide as the second step after choosing a motherboard platform. Normal compatibility checkers are useful for CPU sockets and memory generations, but back-connect builds add a mechanical layer that software cannot always understand. ACEGEEK makes the same broader point in its compatibility guidance: a parts list can pass logical checks while still failing because of cable pressure, radiator offset, headers, or physical installation space.
Back-Connect Does Not Mean Cable-Free
This deserves more attention.
A reverse connector PC case does not eliminate cables. It relocates them.
You still have:
24-pin or alternative motherboard power connections
CPU EPS power
GPU power unless the platform uses a special motherboard-to-GPU power system
USB Type-C front-panel header
USB Type-A internal header
HD Audio
power/reset/front-panel connections
PWM fan cables
ARGB cables
SATA data cables
SATA power
fan and lighting hubs
AIO pump and USB leads
storage cables where applicable
The pretty side gets cleaner.
The ugly side gets busier.
And I consider that the defining engineering problem of back-connect cases.
ASUS BTF vs MSI Project Zero vs GIGABYTE STEALTH
There is no good reason to pretend every hidden-connector platform is identical.
They pursue the same basic goal, but the implementation, product ecosystem, supported cases, motherboard sizes, and GPU-power options differ.
PlatformBasic ApproachWhat Moves Behind the BoardCase RequirementDetail Buyers Should NoticeConventional ATX / M-ATXFront/edge connectorsUsually very littleStandard motherboard trayBroadest chassis compatibilityASUS BTFHidden-connector motherboard designPower, USB, fan and other connectors depending on modelExplicit BTF-compatible tray layoutAdvanced BTF can add motherboard-delivered GPU powerMSI Project ZeroBack-connect motherboard ecosystemPower, fan connectors and other pin headersProject Zero/PZ-compatible cutoutsSome PZ cases support both normal and back-connect boardsGIGABYTE STEALTHReverse-connector designMajor motherboard connectors moved rearwardSTEALTH/reverse-connector-ready caseEcosystem now extends across multiple third-party case makers
ASUS's BTF hidden-connector design is especially interesting because the company's Advanced BTF implementation goes beyond hiding motherboard cables. On models such as the TUF Gaming B850-BTF WIFI W, ASUS says its graphics-card high-power slot can deliver up to 600 watts through the motherboard for a compatible BTF graphics card.
That is not normal cable management.
That is platform-level integration.
MSI takes a more explicit ecosystem approach with MSI Project Zero. MSI says Project Zero moves power connectors, fan connectors, and other pin headers to the rear, then pairs those motherboards with dedicated PZ cases and other Project Zero hardware.
And GIGABYTE has been pushing the idea for longer than many buyers realize. Its Project STEALTH traces the concept back to the Z690 AORUS ELITE STEALTH generation, where ATX power, CPU power, fan, USB, audio, and front-panel connections were moved behind the board. A 2025 GIGABYTE announcement said the STEALTH ecosystem had expanded through partnerships with more than 10 case manufacturers and more than 20 reverse-connector-ready case models.
This matters.
A proprietary curiosity can disappear.
A layout supported by multiple chassis manufacturers has a better chance of surviving your next upgrade.
Back-Connect Motherboard Compatibility Is the First Check
Here is my rule:
Never buy the case first because it says “back-connect ready.”
Buy it because it explicitly supports the exact motherboard form factor and connector layout you plan to use.
“Supports M-ATX” does not automatically mean:
“Supports every Micro-ATX back-connect motherboard.”
Those statements are not equivalent.
Check the Motherboard Tray, Not Just the Form Factor
A normal case motherboard tray mainly needs mounting holes and cable pass-throughs.
A rear connector motherboard case needs much more deliberate geometry.
Look for cutouts behind:
24-pin motherboard power
CPU EPS power
USB 3.x header
USB Type-C front-panel header
front-panel switches and LEDs
HD Audio
SATA ports
fan headers
ARGB headers
Then compare those cutouts against photographs or diagrams of your exact motherboard.
Do not assume.
ASUS explicitly states on BTF motherboard pages that certain models require specific compatible cases. MSI similarly positions Project Zero motherboards alongside compatible PZ chassis. That tells us something the marketing language often avoids saying clearly: the connector layout and the chassis tray must be designed together.
Can a Back-Connect Case Also Use a Normal Motherboard?
Sometimes.
And I strongly prefer cases that can.
A hybrid design gives you conventional mounting positions plus the additional cutouts required for rear-connector boards. That means you can use a traditional ATX/M-ATX board today and potentially move to a reverse connector motherboard later.
MSI, for example, lists Project Zero-compatible PANO designs that support both back-connect and regular motherboard installation.
That is good engineering because it lowers platform lock-in.
If two otherwise equal cases are available and one supports both motherboard styles, I would take the flexible chassis.
Ports Matter More Than the Beauty Shot
Front I/O is where I see too many case comparisons become lazy.
A case can have a USB-C port on the front and still leave you unable to use it.
Why?
Because the motherboard needs the appropriate internal header, and a back-connect board changes where that header physically lives.
Check Every Front I/O Connection
For a modern back-connect PC case, I would verify at least:
USB Type-C port count
USB Type-A port count
internal USB Type-C header requirement
USB 3.x internal header requirement
USB 2.0 requirement where used
HD Audio connection
reset switch
power switch
LED control switch
fan/RGB controller connections
Do this before ordering the motherboard.
Not after.
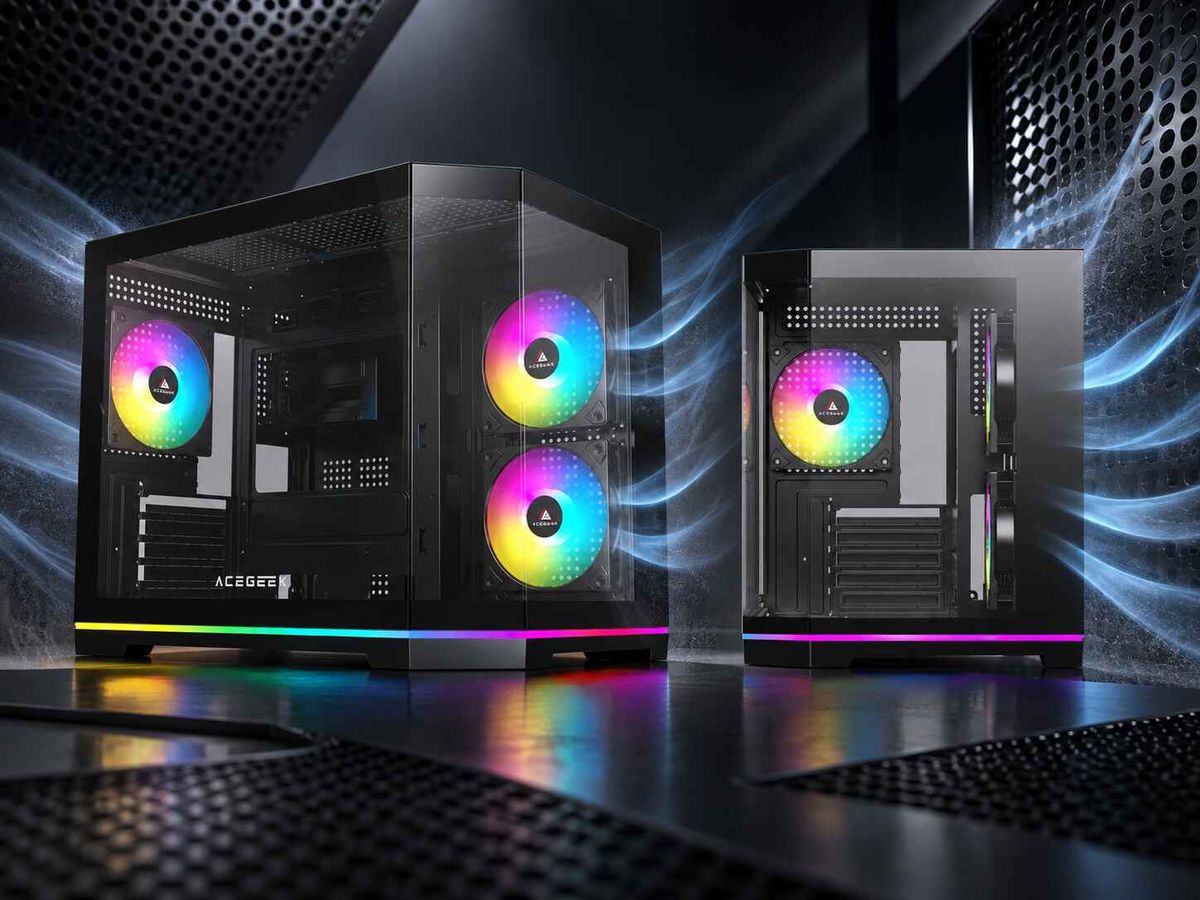
ACEGEEK's Lucid back-connect case is a useful real example. Its published specifications list one Type-C port, one USB 3.0 port, one USB 2.0 port, and HD Audio on the front I/O. It supports M-ATX and ITX motherboards, up to a 400 mm GPU, a 165 mm CPU cooler, top 360/280 mm liquid cooling, and side 280/240 mm liquid cooling.
Those numbers tell me much more than “clean cable design.”
A buyer can now ask:
Does my board have the right internal Type-C header?
Can the cable reach without crossing another rear connector?
Will a 360 mm top radiator interfere with EPS access?
Can I remove RAM later?
Will my GPU still have intake air after the bottom fans are installed?
That is how I want people buying cases.
Rear Cable Space Is Where Back-Connect Cases Succeed or Fail
Cord shame sells cases.
Rear depth keeps them usable.
Once nearly every motherboard cable enters from behind the tray, the cable-management chamber is no longer storage for whatever you want to hide.
It becomes an installation zone.
That zone needs room for thick connectors, folded cable bundles, fan hubs, SATA power chains, USB plugs, cable ties, and sometimes the ends of modular PSU leads.
If the rear chamber is shallow, three ugly things happen.
First, cables stack on top of each other.
Second, the side panel begins compressing plugs and wire bundles.
Third, future servicing becomes miserable because removing one fan controller can require disturbing half the system.
ACEGEEK's analysis of PC case size and cable management makes the right distinction: routing cables behind the motherboard improves order and serviceability only when the case has enough depth, tie-downs, and panel clearance to keep those cables from being crushed.
I agree.
A back-connect layout with 15 Velcro straps and no usable cable depth is still a bad cable-management system.
My Rear-Chamber Inspection Checklist
Before buying, inspect product photos and specifications for:
Wide openings behind the motherboard connectors
Cable channels rather than random holes
Strong tie-down points
Space beside the PSU
Fan/RGB hub mounting positions
SSD mounts that do not compete with thick cables
Side-panel clearance
Removable panels or brackets for servicing
Cable exit routes near the motherboard connectors
Enough access to unplug cables without removing the motherboard
The last point is underrated.
A clean first build is nice.
A clean repair three years later is better.
Back-Connect PC Cable Management Can Still Go Wrong
The assumption is that moving connectors backward automatically produces better cable management.
Not always.
You can still make a mess behind the tray.
Do Not Stack High-Current Cables Under Everything Else
I like separating cable groups by function:
Power: motherboard, EPS, GPU and SATA power.
Control: fan PWM, ARGB, temperature sensors and hub leads.
Data: USB, SATA data, AIO USB and internal display connections.
That makes troubleshooting dramatically easier.
If a fan suddenly stops spinning, I do not want to unwrap the 24-pin motherboard lead just to reach a PWM splitter.
Leave Connectors Serviceable
Cable ties can become a trap.
Do not pull every cable flat against the tray simply because the rear chamber has mounting points.
Leave enough slack to:
unplug a header
remove a fan hub
replace an SSD
remove the PSU
open a radiator bracket
swap the motherboard
Perfect cable photographs often produce terrible maintenance.
I would rather see five centimeters of sensible service slack than a showroom cable run that must be cut apart every time something changes.
Cooling Compatibility Still Comes Before Cable Appearance
Back-connect does not repeal thermodynamics.
The GPU still needs fresh air.
The radiator still occupies physical space.
The RAM still has height.
The side panel still closes at a fixed location.
And a 360 mm radiator remains a radiator whether the motherboard cables are visible or not.
This is why I would pair any back-connect buying decision with ACEGEEK's guide on why top-mounted radiators can interfere with RAM.
A typical 27 mm radiator plus 25 mm fans already creates a 52 mm stack. A thicker 38 mm radiator with the same fans becomes 63 mm. That extra 11 mm can decide whether the fan frame overlaps RAM, the VRM heatsink, EPS access, or motherboard connectors.
Back-connect can make the visible chamber cleaner.
It cannot create millimeters.
GPU Clearance Needs the Same Suspicion
If a case claims 400 mm graphics-card clearance and your card is 360 mm long, do not immediately celebrate your 40 mm margin.
Ask what else occupies that area.
Front radiator?
Fan bracket?
Vertical GPU hardware?
Pump reservoir?
Cable?
Support bracket?
The broader ACEGEEK PC case collection is useful because it exposes motherboard and liquid-cooling support alongside each chassis rather than treating all cases with similar external dimensions as interchangeable.
That is the buying behavior I recommend.
Compare systems, not photos.
Three Real Back-Connect Case Studies Tell Us Where the Market Is Going
ASUS BTF: From Hidden Cables to GPU Power Integration
ASUS originally pushed BTF around hidden motherboard connectors, then expanded the idea with Advanced BTF.
That second stage matters.
The TUF Gaming B850-BTF WIFI W lists a special graphics-card high-power slot capable of delivering up to 600 W to a compatible BTF graphics card.
My interpretation is simple: BTF is no longer just a prettier 24-pin location.
It is moving toward deeper integration between motherboard, GPU and chassis.
That improves visual cleanliness but increases the importance of checking the entire component ecosystem.
MSI Project Zero: Make the Case and Board Work as a Pair
MSI's approach is easier to explain to buyers.
Move the connectors behind the board.
Build PZ motherboards.
Build compatible PZ cases.
Then expand the ecosystem through chassis partners.
The MSI Project Zero platform explicitly describes a combination of PZ motherboards, compatible cases and Project Zero hardware rather than presenting the motherboard alone.
That is the right framing.
A rear connector motherboard without an appropriate case is unfinished hardware.
GIGABYTE STEALTH: Compatibility Became the Competitive Fight
GIGABYTE's early Project Stealth package in 2022 paired a Z690 AORUS ELITE STEALTH motherboard, RTX 3070 GAMING OC STEALTH graphics card and C300G STEALTH case.
By May 2025, GIGABYTE said its reverse-connector case compatibility had grown through 10+ case-manufacturer partnerships covering more than 20 chassis models.
That tells me where the real competition is heading.
Not who can hide the most cables.
Who can make the format easiest to buy without trapping the user inside one case.
How to Check Back-Connect PC Case Compatibility Before Buying
This is the checklist I would actually use.
Step 1: Write Down the Exact Motherboard Model
Not “BTF.”
Not “Project Zero.”
Not “Micro-ATX.”
Write the complete SKU.
Then open the motherboard support page.
Step 2: Confirm Explicit Case Support
Look for wording such as:
BTF compatible
Project Zero compatible
PZ compatible
STEALTH compatible
reverse-connector ready
back-connect motherboard support
If the manufacturer does not state it, do not invent compatibility.
Step 3: Compare Tray Cutouts
Use rear-side motherboard photographs.
Match every major connector against the case tray.
Step 4: Verify Front I/O Headers
Make sure your motherboard can actually drive every port you are paying for.
Especially USB Type-C.
Step 5: Inspect Rear Chamber Depth
Look for room behind:
the 24-pin connection
CPU EPS connections
USB headers
SATA ports
fan hubs
SSD mounts
Step 6: Check PSU Cable Routing
Back-connect does not mean special PSU by default.
But you still need enough cable length and usable connector orientation.
Do not force an EPS lead around an impossible corner just because the front chamber looks clean.
Step 7: Check GPU Power
A conventional GPU still needs its normal PCIe/12V-2x6 power arrangement.
An Advanced BTF graphics card may use a compatible high-power motherboard slot instead.
Know which system you are buying.
Step 8: Add the Cooling Hardware
Record:
GPU length
GPU thickness
CPU cooler height
radiator length
radiator thickness
fan thickness
RAM height
PSU length
Then recalculate clearances after installation.
Step 9: Check Future Motherboard Options
This is the one buyers skip.
Ask:
If I replace the motherboard in three years, will this case still make sense?
That question can turn a beautiful purchase into a much smarter one.
Best Back-Connect PC Case: What I Would Prioritize
I do not think the best back-connect PC case is the chassis that hides the most cables.
It is the chassis that makes the hidden cables easy to install, easy to service, and unlikely to restrict your next hardware upgrade.
My priority order is:
Exact back-connect motherboard compatibility
Hybrid standard/reverse motherboard support if available
Rear cable-management depth
GPU clearance
CPU cooler and radiator clearance
Front USB-C and useful I/O
Direct GPU intake
Accessible fan and ARGB hubs
Removable dust filters
Easy panel removal
PSU cable-routing space
Future platform flexibility
Appearance
Yes, appearance is thirteenth.
That will irritate some people.
Good.
A computer case has to work after the glass stops being exciting.
FAQs
What is a back-connect PC case?
A back-connect PC case is a computer chassis designed with motherboard-tray openings and rear cable space for compatible motherboards that relocate power, USB, fan, audio, storage, and front-panel connectors behind the motherboard, creating a cleaner visible chamber while requiring more specific mechanical compatibility between the motherboard and case.
The concept is used by ecosystems including ASUS BTF, MSI Project Zero, and GIGABYTE STEALTH. Always verify the exact motherboard model against the chassis compatibility list rather than assuming every reverse-connector motherboard fits every back-connect case.
Are back-connect PC cases compatible with normal motherboards?
Many back-connect PC cases are compatible with normal motherboards when the chassis retains standard ATX, Micro-ATX, or Mini-ITX mounting points alongside the additional rear-connector cutouts, but compatibility varies by model and should be verified through the case manufacturer's specification rather than inferred from the case size alone.
Hybrid support is worth seeking because it preserves upgrade flexibility. Some MSI Project Zero-compatible cases, for example, support both conventional and back-connect motherboard installation.
Is ASUS BTF compatible with MSI Project Zero cases?
ASUS BTF and MSI Project Zero should not be assumed to be universally cross-compatible because both platforms relocate connectors behind the motherboard but can use different board sizes, connector positions, tray openings, and supported chassis lists, so the exact motherboard and case combination must be explicitly verified before purchasing either component.
A case manufacturer may support multiple reverse-connector ecosystems, but the words “back-connect ready” alone are not enough evidence. Check the product page or compatibility documentation for your exact ASUS, MSI, or GIGABYTE motherboard.
Does a back-connect PC case improve airflow?
A back-connect PC case can improve internal airflow when moving cables behind the motherboard removes real obstructions from fan intakes, GPU breathing zones, radiator surfaces, and exhaust paths, but it does not automatically lower temperatures because panel restriction, fan placement, radiator position, GPU heat output, and intake geometry remain the dominant cooling factors.
In many builds the larger benefit is visual cleanliness and service organization rather than a dramatic temperature reduction. A badly ventilated back-connect glass case can still cool worse than a simple conventional mesh chassis.
Do I need a special power supply for a back-connect PC case?
A back-connect PC case normally does not require a special PSU solely because the motherboard connectors face rearward; however, the power supply still needs the correct motherboard, EPS, GPU, SATA, and peripheral connectors plus enough cable length and rear-chamber space to reach those connectors without excessive tension, compression, or unsafe routing.
Advanced systems are different. ASUS Advanced BTF hardware can use a special motherboard-to-GPU high-power connection with compatible components, so check the exact motherboard and graphics-card architecture rather than assuming every back-connect build uses conventional GPU cabling.
How do I check back-connect PC case compatibility?
To check back-connect PC case compatibility, match the exact motherboard SKU with the chassis support list, verify motherboard-tray cutout positions, inspect rear cable depth, confirm front USB and audio headers, measure GPU and radiator clearances, verify PSU cable routing, and check whether your cooling hardware blocks connectors or service access.
I would then inspect real product photographs from both sides of the motherboard tray. Specifications tell you what should fit; rear-side images show whether you will actually have enough room to connect, bend, secure, unplug, and service the cables.
Is a back-connect PC case worth buying?
A back-connect PC case is worth buying when you value an unusually clean visible chamber, easier access to front-side components, simplified visual cable management, and a modern showcase build, provided that your motherboard ecosystem is explicitly supported and the chassis offers enough rear cable room, cooling clearance, airflow, ports, and future upgrade flexibility.
I would not pay extra purely for hidden connectors. I would pay for a complete design in which the tray openings, rear chamber, cooling system, front I/O, PSU routing, panels, and motherboard support were clearly designed around one another.
Your Next Step: Audit the Case Before You Buy It
Do not start with RGB.
Start with the motherboard model.
Then open the case specifications and check every connector position, motherboard format, rear cutout, front USB header, GPU dimension, radiator location, fan stack, PSU route, and cable-management zone.
If you are still choosing a chassis, compare the ACEGEEK PC case lineup and look closely at the ACEGEEK Lucid back-connect case as a reference for how motherboard support, 400 mm GPU clearance, 165 mm CPU cooler clearance, 360/280 mm top radiator support, side liquid-cooling support, and Type-C front I/O should be documented before purchase.
Then verify the entire parts list against the full PC compatibility checklist.
Because the cleanest PC is not the one with the fewest visible cables.
It is the one you do not have to rebuild after discovering that the motherboard and case were never truly compatible.