How to Reduce AIO Liquid Cooler Fan Noise Without Overheating
An AIO liquid cooler should help keep your CPU cool, but it shouldn't have to sound like a small vacuum cleaner every time you open an application or start a game.
If your radiator fans constantly speed up and slow down, the problem may be an aggressive fan curve rather than insufficient cooling performance.
The most effective way to reduce AIO fan noise is to identify the sound source, adjust radiator fan behavior, and remove airflow restrictions before considering replacement hardware.
However, not every sound comes from the fans. Pump vibration, trapped air, loose mounting hardware, and case turbulence can produce similar symptoms.
This guide explains how to make your AIO liquid cooler quieter while maintaining safe CPU temperatures.
Why Is My AIO Liquid Cooler So Loud?
AIO coolers produce noise from several components, and each requires a different solution.
The radiator fans generate airflow and motor noise. The pump circulates coolant through the loop, while the case structure can transmit vibrations or create turbulence around ventilation openings.
Common causes include:
Aggressive radiator fan curves
CPU temperature spikes triggering unnecessary RPM changes
Dust buildup on radiator fins and filters
Restricted airflow through case panels
Pump vibration or trapped air
Loose fan screws or mounting brackets
Worn fan bearings
The first step is determining which of these is responsible.
For example, radiator fans that repeatedly accelerate during light desktop use may only need a smoother control curve.
A persistent grinding sound or unusually high CPU temperature, however, requires more careful troubleshooting.
How Do You Identify AIO Fan Noise vs. Pump Noise?
Before changing cooling settings, pay attention to the type of sound and when it occurs.
Noise TypePossible SourceRecommended First CheckLoud rushing airHigh radiator fan RPMInspect fan curveRepeated speeding up and slowing downRapid fan response to CPU temperatureAdd fan response delayHigh-pitched whineFan motor, pump motor, or airflow turbulenceCompare supported speed settingsGurgling or bubblingAir circulating near the pumpCheck radiator orientationRattlingLoose mounting hardware or vibrationInspect screws and bracketsClicking or scrapingFan obstruction or bearing problemShut down and inspect fan clearancePersistent mechanical grindingPossible pump or fan failureStop heavy workloads and contact support
A Simple Way to Locate the Noise
With the PC running at a light workload, open your motherboard's fan-control utility or the software provided with your AIO.
Observe the radiator fan RPM and listen while adjusting the fan speed within the supported range.
If the sound changes with fan RPM, investigate the radiator fans or nearby airflow restrictions.
If the noise remains, check whether it changes with a manufacturer-supported pump profile.
Never stop the pump to identify a noise source, and do not operate the CPU under heavy load with inadequate coolant circulation.
Before inspecting physical connections, shut down the PC and disconnect power.
Identifying the source first can prevent unnecessary fan or cooler replacement.
What Is the Best AIO Fan Curve for Quiet Cooling?
A fan curve controls how quickly your radiator fans rotate at different temperatures.
Many default fan profiles respond aggressively to CPU temperature changes.
This can make an AIO cooler unnecessarily loud during everyday tasks.
Why CPU Temperature Spikes Cause Fan Noise
Modern processors can change temperature rapidly when their workloads increase.
Opening software, loading a game, or compiling a program may cause a short CPU temperature spike.
The coolant inside an AIO, however, warms more gradually because the liquid loop and radiator have thermal mass.
If the radiator fans immediately react to every brief CPU temperature increase, they may repeatedly accelerate even when the coolant has barely warmed.
The solution is to configure a fan curve that responds smoothly to temperature changes while retaining adequate cooling capacity for sustained workloads.
How to Adjust Your AIO Fan Curve
Start by identifying whether your fans use 4-pin PWM control or another supported speed-control method.
For 4-pin PWM fans connected to a compatible motherboard header, select PWM mode rather than assuming automatic detection is correct.
Then follow these steps:
Record your current settings. Save the existing fan profile before changing anything.
Find the lowest stable fan speed. Follow the fan manufacturer's operating limits and confirm that the fans rotate consistently.
Reduce unnecessary low-temperature acceleration. Keep the curve relatively gentle during light workloads.
Increase fan speed progressively. Allow greater airflow as temperatures rise under sustained CPU load.
Add response delay if supported. This can prevent brief temperature spikes from causing immediate RPM surges.
Preserve high-temperature cooling. Keep adequate fan-speed headroom near the CPU's specified operating limits.
Some motherboard controllers allow separate fan ramp-up and ramp-down delays.
As an initial experiment, a ramp-up delay of approximately 3–5 seconds and a longer ramp-down delay of around 10–20 seconds may help reduce repeated speed changes.
These are tuning suggestions, not universal settings. Use only delay options supported by your controller, and validate CPU temperatures under sustained load.
Why You Shouldn't Copy a Fan Curve Blindly
A quiet profile for a 360mm AIO may not suit a smaller radiator or a higher-power CPU.
Actual cooling requirements depend on:
CPU power consumption
Radiator size and thickness
Fan characteristics
Case airflow
Ambient room temperature
Cooler mounting quality
A fan curve should be adjusted around your hardware and actual workloads rather than copied from another system.
Should AIO Fans Use CPU or Coolant Temperature?
If your AIO provides a reliable coolant-temperature sensor, it can be a useful control source for radiator fans.
CPU temperature represents the processor's immediate thermal condition, while coolant temperature reflects the heat accumulating in the liquid loop.
The difference matters because the radiator does not need to respond instantly to every short processor boost event.
Control SourceMain AdvantageMain LimitationCPU temperatureAvailable on nearly every PC and useful for detecting immediate CPU heatCan cause frequent fan-speed changesCoolant temperatureResponds more gradually to sustained cooling demandRequires a compatible sensor and controller
When Coolant Temperature Is Available
Using coolant temperature can produce smoother radiator fan behavior.
The fans can remain relatively quiet while coolant temperature is low and gradually increase speed as the liquid warms.
However, the exact temperature thresholds must follow your cooler manufacturer's guidance.
CPU temperature should still be monitored for thermal protection.
When Only CPU Temperature Is Available
A CPU-based curve can still work well.
Use a gentler response to lower-temperature fluctuations, apply smoothing or delays where supported, and verify that the radiator fans accelerate appropriately during sustained high loads.
For a more detailed explanation of sensor selection, see the ACEGEEK guide to coolant temperature vs. CPU temperature for fan control.
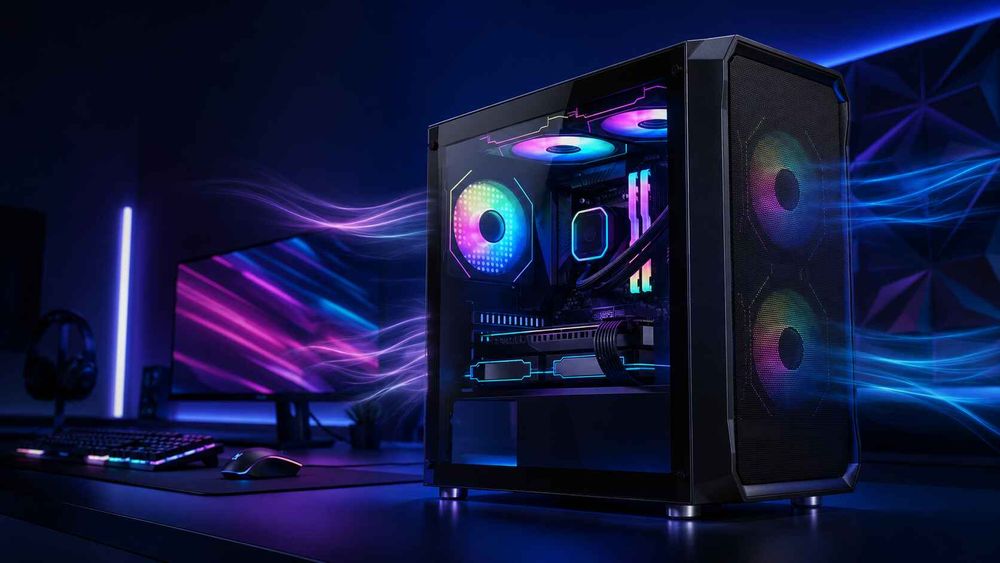
How Can You Reduce Radiator Airflow Noise?
Not all AIO fan noise is caused by the fan motor.
Sometimes, the air moving through the radiator, dust filter, or case grille creates the most noticeable sound.
A restrictive airflow path can force the fans to operate at higher speeds to achieve the necessary cooling.
Clean the Radiator and Dust Filters
Dust accumulation increases airflow resistance and reduces effective heat dissipation.
Inspect the radiator fins and nearby filters regularly.
If cleaning is necessary:
Shut down and unplug the PC.
Remove accessible dust filters.
Use a suitable soft brush or carefully controlled compressed air.
Keep fan blades from spinning freely during compressed-air cleaning.
Avoid bending radiator fins.
Reinstall filters and panels securely.
Cleaning a clogged radiator may improve cooling enough to reduce the fan speed required during gaming or rendering.
Check Case Ventilation
A radiator positioned behind a restrictive panel may produce turbulence and additional airflow noise.
Inspect whether the cooler has a clear intake or exhaust path.
Check for nearby cables, decorative grilles, blocked ventilation openings, or panels positioned too close to the fans.
If you suspect the case is restricting airflow, compare temperatures and noise with the normal panels installed and, where safe, during a brief diagnostic test with the relevant panel removed.
Keep workloads and fan settings consistent.
Do not treat panel removal as a permanent cooling solution.
For more practical airflow improvements, read the ACEGEEK guide to building a high-airflow PC without overspending.
Does Push or Pull Affect Radiator Noise?
Radiator fans can be configured in two common ways.
Push configuration: The fans push air through the radiator.
Pull configuration: The fans draw air through the radiator.
Either arrangement can provide effective cooling.
However, differences in fan inlet conditions, radiator design, grille clearance, and mounting position can affect turbulence and noise.
If both configurations are mechanically supported, compare them under similar cooling and acoustic conditions.
Do not assume that changing the fan orientation will always provide a measurable improvement.
How Do You Fix AIO Pump Humming or Gurgling?
Pump-related noise requires a different approach from radiator fan noise.
A pump may generate a steady hum or high-frequency tone during normal operation.
However, persistent gurgling, grinding, or sudden changes in sound can indicate trapped air, vibration, or a mechanical issue.
Check the Radiator Position
Most AIO liquid coolers contain a small amount of air.
Where that air collects depends on the loop layout.
For conventional AIO designs with a pump integrated into the CPU block, the radiator should generally have an upper section positioned above the pump.
This helps keep the main air pocket away from the pump.
Common configurations include:
Top-mounted radiator: Often keeps the radiator above the CPU pump block.
Front-mounted radiator: Can work well when the radiator's upper section remains above the pump. Tube connections at the bottom are preferable when supported.
Bottom-mounted radiator: Generally unsuitable for conventional CPU-block-pump AIOs because air may collect in the pump.
Some AIOs place the pump elsewhere in the loop, so always follow your exact cooler's installation instructions.
For detailed mounting guidance, see the ACEGEEK AIO radiator placement guide.
Check for Mechanical Vibration
Pump vibration may travel through the cold plate, motherboard, radiator brackets, or chassis panels.
With the PC shut down, inspect the mounting hardware.
Make sure:
The pump block is correctly installed.
Radiator brackets are secure.
Fan frames are not distorted by overtightened screws.
Tubes do not press forcefully against the side panel.
Loose cables are not contacting fan blades.
Follow the cooler manufacturer's specified mounting procedure rather than tightening screws beyond their designed limits.
Should You Reduce AIO Pump Speed?
Only if your cooler supports adjustable pump operation.
Some models offer predefined pump modes that allow a quieter daily configuration.
Others require a fixed operating speed.
Do not lower the pump below the manufacturer's permitted range or connect it to an inappropriate fan-control setting.
If the pump produces abnormal mechanical noise, stops operating, or no longer cools effectively, contact the manufacturer rather than attempting to silence it through unsupported settings.
When Should You Replace Noisy AIO Fans?
Replacing radiator fans can help when the existing fans have poor bearings, unstable low-speed operation, or unpleasant tonal noise.
However, new fans will not solve every noise problem.
Before buying replacements, check whether:
The fan curve has been optimized.
Radiator fins and filters are clean.
Case ventilation is sufficient.
The fans are correctly mounted.
Noise originates from the radiator fans rather than the pump.
If replacement is justified, prioritize performance under radiator resistance rather than maximum airflow alone.
Useful features include:
Compatible 120mm or 140mm dimensions
Appropriate fan thickness
Reliable PWM speed control
Suitable static-pressure performance
Stable low-speed operation
Acceptable acoustic behavior
Correct mounting and cable compatibility
A radiator adds airflow resistance, so a fan with a high free-air CFM rating is not automatically the quietest or most effective radiator option.
For a broader explanation of cooling performance and acoustics, see the ACEGEEK CPU cooler noise vs. performance guide.
How Do You Test AIO Noise Without Sacrificing Cooling?
After making adjustments, test the cooling system under repeatable conditions.
A fan profile that sounds quiet on the desktop may not provide enough cooling during sustained CPU-intensive workloads.
Step 1: Establish a Baseline
Record the following before changing the settings:
MeasurementWhy It MattersCPU package temperatureShows processor operating temperatureCPU package powerHelps compare equivalent heat loadsAmbient temperatureIdentifies differences in room conditionsRadiator fan RPMReveals fan-speed behaviorPump RPM, if availableHelps monitor pump operationCoolant temperature, if availableShows the thermal condition of the liquid loopNoise at a consistent locationHelps compare acoustic changes
Use the same software, hardware settings, and fan-control mode when comparing results.
Step 2: Test Light and Heavy Workloads
Begin with normal desktop activities and confirm that fan speeds remain stable.
Next, run a representative gaming or CPU-intensive workload long enough for the cooling system to reach reasonably stable temperatures.
Monitor CPU temperatures, clocks, and thermal-throttling indicators.
Do not assume that a cooler is performing well simply because its fans are quieter.
Step 3: Change One Setting at a Time
Modify one fan-curve point, delay setting, or supported control profile.
Repeat the workload and compare the results.
Changing several settings simultaneously makes it difficult to identify which adjustment improved the noise behavior.
Step 4: Confirm Thermal Safety
The target is quiet operation with reliable cooling, not the lowest possible fan speed.
If CPU temperatures become excessive, performance is reduced by thermal throttling, or the cooler shows signs of malfunction, restore a known-safe configuration and investigate the cause.
For more detailed testing, compare noise levels at a fixed listening position while maintaining similar ambient temperature and CPU power consumption.
Smartphone sound-meter applications can be useful for rough relative comparisons, but they should not be treated as calibrated laboratory measurements.
Frequently Asked Questions
Why do my AIO fans get loud when I open a program?
A short CPU temperature spike may trigger an aggressive fan curve. A smoother fan response, appropriate delays, or coolant-temperature-based control can reduce unnecessary acceleration, provided thermal safety is maintained.
Should AIO radiator fans run at full speed?
Not continuously for every workload. Full speed may be appropriate during demanding conditions or when additional cooling is necessary. For lighter workloads, a properly configured variable-speed profile can reduce noise while maintaining adequate temperatures.
Is it normal for an AIO pump to make noise?
Some motor hum is normal. However, persistent grinding, unusually loud gurgling, or sudden changes in pump noise should be investigated. Check installation, operating settings, and cooling performance.
Can I reduce AIO fan noise without replacing the fans?
Often, yes. Adjusting the fan curve, cleaning airflow restrictions, correcting mounting issues, and avoiding problematic RPM ranges may improve acoustic behavior without new hardware.
Can lowering radiator fan speed damage my CPU?
Reducing fan speed within supported settings is not inherently damaging, but insufficient cooling can cause excessive temperatures or thermal throttling. Always monitor CPU behavior, preserve appropriate high-temperature fan response, and follow the cooler manufacturer's requirements.
Make Your AIO Quieter Without Compromising Cooling
Reducing AIO liquid cooler noise does not always require expensive replacement fans or a larger radiator.
In many systems, the most useful improvements come from better fan control, cleaner airflow paths, and correct identification of pump or fan noise.
Start by checking the existing fan curve and confirming that the fans respond appropriately to sustained workloads rather than every brief temperature spike.
Then inspect the radiator, filters, mounting hardware, and pump configuration.
If the cooler remains noisy, compare temperatures and sound levels under controlled conditions before deciding whether hardware replacement is necessary.
A well-tuned AIO should remain quiet during light use, increase cooling smoothly under sustained load, and maintain safe CPU operation when performance matters most.