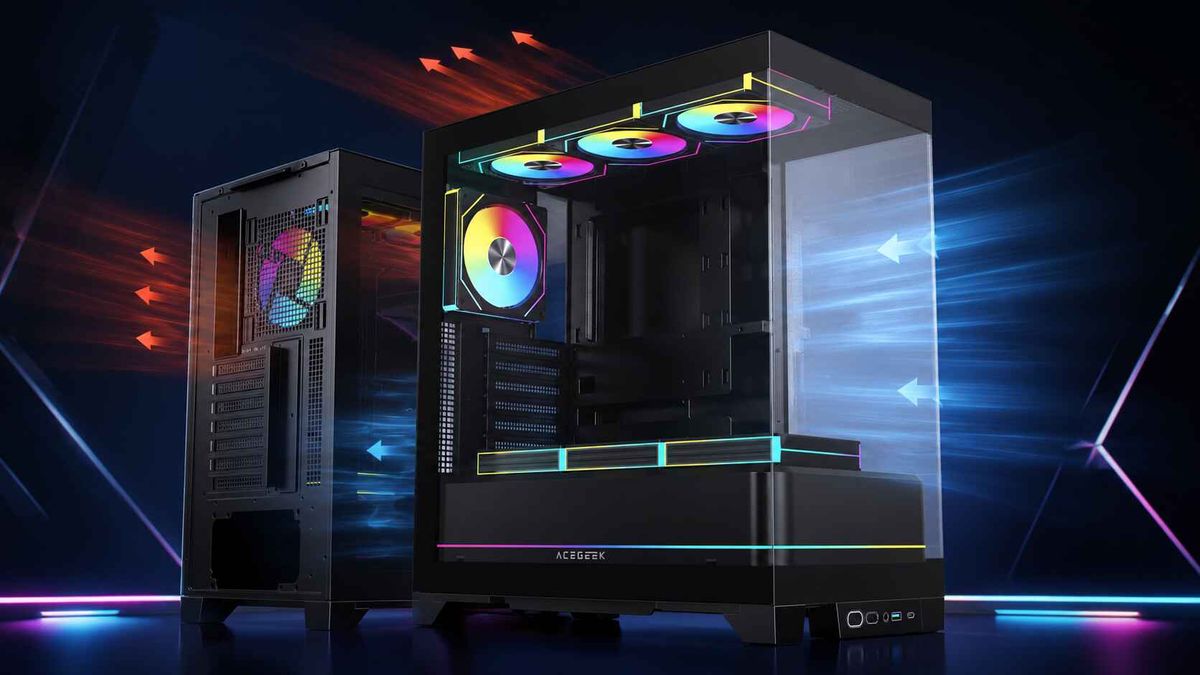
How to Balance Aesthetics and Cooling in Tempered Glass PC Cases
Glass is innocent.
A tempered glass PC case becomes a cooling problem only when its designers place an attractive sheet of glass directly in front of the intake fans, leave a few narrow side slots as an afterthought, and then expect RGB fans to overcome basic fluid resistance through speed and noise.
Why blame the material when the real failure is airflow geometry?
A glass side panel normally has little effect on cooling because it replaces a steel side panel rather than an intake. A sealed glass front panel is different. It can block the shortest route between ambient air and the hottest components in the system.
The hard truth is that many so-called gaming cases are display cabinets with fans attached. They look excellent in a product render. Under a sustained CPU-and-GPU workload, the visual design starts collecting thermal debt.
The best tempered glass PC case does not choose between aesthetics and cooling. It uses glass where visibility matters and ventilation where the hardware needs air.
Tempered Glass Is Not the Real Thermal Problem
Tempered glass has become a convenient scapegoat. The phrase “glass case” now gets used as shorthand for poor airflow, even though the position of the glass matters far more than the material itself.
A glass side panel can display the motherboard, graphics card, memory, cooling tubes, cable routing, and ARGB lighting without blocking the normal front-to-rear airflow path. That arrangement has worked for years.
Problems begin when glass replaces the front intake, particularly in a narrow ATX tower where front fans have only a few millimetres of clearance behind the panel.
The fans still spin. The lighting still works. But the available intake area may be far smaller than the combined circular area of the fans.
That creates several predictable results:
Less cool air reaches the graphics card.
Front fans operate against higher resistance.
Fan speed increases to maintain temperature.
Noise rises without a proportional increase in airflow.
GPU and CPU coolers recycle warmer internal air.
Dust enters through unfiltered gaps when exhaust demand exceeds filtered intake.
Components around the motherboard receive less incidental airflow.
This is why Acegeek’s guide to how front-panel design affects PC case cooling makes an important distinction between airflow fans and static-pressure fans. A stronger pressure-optimized fan can overcome a filter or moderate restriction, but it cannot turn a sealed panel into an open intake.
The Test Data Is Less Forgiving Than the Marketing
I trust controlled comparisons more than product descriptions. When two otherwise similar cases produce meaningfully different temperatures because one has a ventilated front, the argument is effectively over.
Test or Case StudyDesign ChangeMeasured ResultWhat It ProvesCorsair 4000D vs. 4000D AirflowSolid front panel replaced by perforated airflow panelCPU torture temperature fell from 59°C to 50°C above ambient; GPU Blender temperature fell from 26°C to 23.5°C above ambientThe intake panel alone can create a major thermal differenceASUS ProArt PA401 testFront panel removed during airflow measurementInternal air velocity increased from 0.7 m/s to 2.0 m/sA visually refined front panel can reduce measured airflow by roughly 65%2025 Alienware Area-51Engineered positive-pressure layout with six fansDell claimed 25% more airflow and 45% less fan noise; the system reportedly moved 172 CFM and peaked at 38.4 dB in review testingHigh airflow and controlled acoustics can coexist when the entire chassis is engineered as one systemHAVN HS 420 VGPUCurved glass deflector intended to direct intake toward the GPUIndependent testing found that the deflector did not improve performance in the test systemInteresting-looking airflow devices do not automatically produce lower temperatures
In the controlled GamersNexus Corsair 4000D comparison, the ventilated model reduced the CPU result by 9°C above ambient while retaining the same basic chassis and fan configuration. That is not a marginal laboratory curiosity. It is the difference between comfortable thermal headroom and fans repeatedly ramping under load.
The 2025 ASUS ProArt PA401 review produced another revealing result. The reviewer measured approximately 2.0 m/s of internal airflow with the front panel removed, but only 0.7 m/s with the panel installed. The case remained attractive and usable, yet the restriction was measurable and substantial.
Then there is Dell’s 2025 Area-51. According to the published Area-51 cooling engineering report, Dell spent three months running 30 airflow simulations, built a six-fan positive-pressure system, and reported 172 CFM of airflow. A review configuration containing an NVIDIA GeForce RTX 5090 reportedly peaked at 38.4 dB.
That machine still uses a tempered glass door.
The lesson is obvious: glass does not prevent good cooling. Lazy ventilation does.
Modern Hardware Has Made Restrictive Glass Designs Harder to Defend
Older gaming PCs gave case designers more room to make mistakes. Current high-end components can convert several hundred watts of electrical power into heat inside one enclosure.
NVIDIA specifies a 575 W Total Graphics Power rating for the GeForce RTX 5090. Intel lists a 253 W Maximum Turbo Power rating for the Core i9-14900K. These figures are not the total heat output of every real gaming workload, but they demonstrate why a modern performance build can overwhelm an intake system designed around narrow decorative vents.
A 575 W graphics card does not care that the front glass has an elegant mirror finish.
It needs air.
And because the GPU cooler already has its own fans, many buyers assume it will solve the problem independently. It will not. GPU fans can only move the air available around the card. If the intake path supplies warm, slow-moving air, the graphics card responds by increasing fan speed, reducing boost behaviour, or both.
This is also why small changes in case temperature matter. A three-degree reduction in GPU temperature may not look dramatic in a chart, but lower intake temperature can reduce GPU fan RPM, acoustic pitch, memory temperature, hotspot temperature, and heat recirculation around the CPU cooler.
Four Tempered Glass Layouts—and Only Two I Consistently Trust
Glass Side Panel With a Mesh Front
This remains the safest compromise.
You receive a clear view of the components while the intake fans receive a large, low-resistance supply of ambient air. For most air-cooled gaming builds, this is still the layout I would recommend first.
It is not visually radical. It simply works.
A front-mesh design also makes fan selection easier. Standard airflow-oriented fans can operate efficiently because they are not fighting a solid wall. A dust filter still adds resistance, but that resistance is usually manageable if the mesh area is large enough.
Acegeek’s mesh versus tempered glass case comparison reaches the same practical conclusion: start with intake openness, hardware wattage, fan support, and radiator clearance before judging the case by its promotional photography.
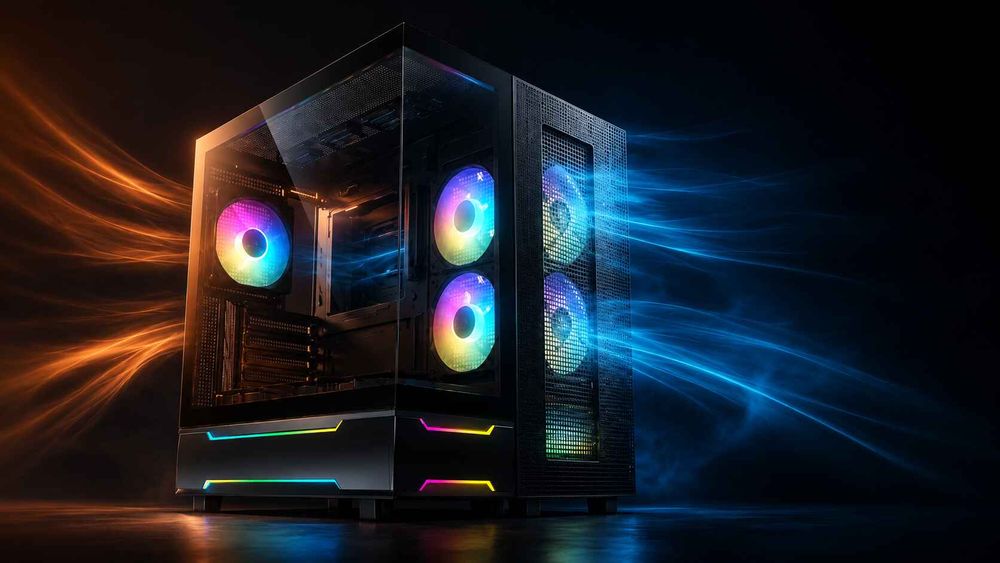
Glass Front With Wide Side Intakes
This design can work, but the details decide everything.
The side vents must be wide, deep, and sufficiently separated from the fan blades. A tiny slot running down each edge may look like ventilation, yet its total open area can remain smaller than the swept area of three 120 mm fans.
Look for:
Intake openings on both sides of the front panel
At least 20–30 mm of breathing space between fans and glass
A removable front panel for cleaning and diagnostic testing
Filter area that matches the intake rather than covering only part of it
Direct airflow toward the upper and lower halves of the graphics card
Fan mounts that do not position most of the blade behind solid framing
The Darkfate Mini Glass, for example, supports three 120 mm or two 140 mm front fans, two bottom 120 mm fans, and two top 120 mm or 140 mm fans. Those mounting positions create several possible airflow strategies, but the builder still needs to inspect the actual intake openings rather than assuming that fan capacity equals airflow capacity.
Panoramic Dual-Glass or “Fish-Tank” Cases
Panoramic cases move the intake away from the conventional front position. The front and side glass create the visual display, while side and bottom fans supply cool air.
This architecture can perform well when the GPU receives direct bottom intake and the side fans feed the CPU cooler or radiator. It fails when bottom clearance is poor, the case sits on thick carpet, or decorative reverse-blade fans are installed in the wrong direction.
A good panoramic configuration usually looks like this:
Three bottom fans as intake
Two or three side fans as intake
One rear fan as exhaust
Two or three top fans or a top radiator as exhaust
Slightly more filtered intake capacity than exhaust capacity
Acegeek’s display-oriented Photon three-side glass case supports three 120 mm bottom fans, three 120 mm or two 140 mm top fans, a 120/140 mm rear fan, and a top-mounted 360 mm AIO. It also provides 420 mm of GPU clearance and 185 mm of CPU-cooler clearance, giving builders room to create an airflow path around large components instead of packing them against the panels.
But more fan mounts do not guarantee better cooling.
Twelve badly positioned fans can produce turbulence, recirculation, bearing noise, and very little useful component airflow. Direction matters more than the fan count printed on the box.
Fully Sealed Glass Front and Side Panels
I would avoid this layout for high-power hardware unless the case has a separate, demonstrably effective intake chamber.
It is the most photogenic design and often the least forgiving. When the only intake consists of narrow rear or bottom gaps, the system may cool acceptably at idle yet become noisy during extended gaming, rendering, AI inference, or video encoding.
This is where buyers get trapped. A five-minute game test may look fine. A 45-minute combined CPU-and-GPU workload exposes the restriction.
How to Build a High-Airflow Tempered Glass PC Case
Give the GPU Its Own Fresh-Air Supply
The graphics card is often the largest heat source in a gaming system. Place intake fans where they can feed the GPU without forcing the air to turn through several sharp angles.
Bottom intake works well in panoramic cases, provided the case has tall enough feet and is placed on a hard surface. Side intake also works when the fans align with the GPU and are not blocked by a radiator.
For a traditional tower, front intake remains the simplest solution.
Use a Clear Intake-to-Exhaust Path
The basic airflow route should be easy to explain in one sentence: cool air enters low or forward, crosses the GPU and CPU area, and exits high or rearward.
The Tom’s Hardware fan-positioning guide similarly recommends directing intake air toward the GPU and CPU, typically from the front or bottom, before exhausting it through the rear or top.
Do not create opposing fan groups that blow directly at one another. And do not install a powerful top-front exhaust fan that removes fresh front-intake air before it reaches the CPU cooler.
Aim for Slight Positive Pressure
Positive pressure means the intake fans collectively move somewhat more air than the exhaust fans.
This arrangement encourages air to leave through vents and gaps rather than pulling dust inward through every unfiltered opening. It is not calculated simply by counting fans. A 140 mm intake at 1,200 RPM may move more air than a restricted 120 mm exhaust at 1,500 RPM, while filters and radiators alter the real result further.
A practical starting point is:
Three front or bottom intake fans
One rear exhaust fan
Two top exhaust fans running at a lower speed
Intake fans set approximately 10–20% faster than the exhaust group when filters are restrictive
Then test. Theory is useful; temperature and noise measurements are better.
Match Fan Type to the Obstruction
Use high-airflow fans in open mesh positions. Use higher-static-pressure fans when pulling through a radiator, dense dust filter, or moderately restricted side intake.
Four-pin PWM control is worth paying for. It allows the motherboard or controller to run the fans slowly at idle and increase speed only when CPU, GPU, or coolant temperature rises.
I prefer GPU-temperature-based case fan control where the software and controller support it. In many gaming systems, the GPU produces more sustained heat than the CPU, so controlling every chassis fan from CPU temperature alone can produce strange behaviour: fans surge during brief CPU spikes yet react too slowly during a long GPU workload.
Do Not Let the Radiator Steal the GPU’s Air
A front-mounted radiator configured as intake can improve CPU temperature because the radiator receives ambient air. The penalty is that the warmed radiator exhaust then enters the case and reaches the graphics card.
A top-mounted radiator configured as exhaust often provides a better overall balance in a gaming build. The CPU may run a few degrees warmer, but the GPU receives cooler intake air.
For a CPU-heavy workstation, front or side radiator intake may still be the better decision. For a GPU-heavy gaming or rendering system, direct unheated GPU intake usually deserves priority.
There is no universal answer. The workload decides.
Keep the Display Clean Without Blocking Air
Cable management improves both appearance and serviceability, but modern cables rarely create a dramatic temperature difference unless they physically block a fan or sit directly against a cooler.
Manage cables because the case has glass. Route them behind the motherboard tray, use short visible runs, and avoid stuffing excess cable into the intake chamber.
RGB should also be planned as part of the airflow layout rather than added afterward. Reverse-blade intake fans are useful in panoramic builds because they show the visually cleaner side while still drawing air inward. Always verify the airflow arrow on the fan frame; appearance alone is unreliable.
A Five-Minute Test That Exposes a Restricted Front Panel
This is the simplest diagnostic procedure I recommend for an existing tempered glass case:
Record room temperature.
Run a repeatable gaming benchmark or combined CPU-and-GPU workload for 20–30 minutes.
Record CPU package temperature, GPU core temperature, GPU hotspot temperature, fan RPM, and noise if possible.
Allow the system to return to idle temperature.
Remove only the front panel.
Repeat the same workload with identical fan curves and room conditions.
Interpret the result carefully:
A 1–2°C change may be within normal test variation.
A 3–5°C reduction suggests meaningful intake restriction.
A reduction above 5°C strongly suggests that the front panel is limiting cooling.
A large temperature reduction combined with lower fan RPM confirms that the panel is affecting both thermals and acoustics.
Do not run permanently without filters or protective panels unless the case is designed for it. The test is diagnostic. Its purpose is to determine whether the intake geometry—not the cooler, thermal paste, or number of fans—is the main bottleneck.
Choosing the Best Tempered Glass PC Case for Airflow
Before buying, ignore the RGB photos and inspect the specification drawing.
Start with Acegeek’s broader PC case selection guide, then verify the following against your actual components:
Exact graphics-card length and thickness
Clearance between the GPU and bottom fans
CPU-cooler height
Radiator length, thickness, and fan thickness
Motherboard format
Number and location of intake positions
Total open intake area
Dust-filter coverage
Distance between glass and fan blades
Front, side, bottom, rear, and top exhaust options
Availability of PWM and ARGB headers
Space for cable routing behind the motherboard tray
My rule is simple: a tempered glass PC case should earn its glass.
If the design uses glass on two or three sides, it must compensate with serious bottom and side ventilation. If it uses a glass front, the side intake openings must be large enough to serve the installed fans. If the specification lists ten fan positions but shows no clear source of fresh air, treat the fan count as decoration.
FAQs
Is a tempered glass PC case bad for airflow?
A tempered glass PC case is not inherently bad for airflow; it becomes a thermal problem when glass replaces an intake surface without enough side, bottom, front-edge, or rear ventilation, forcing fans to pull through narrow gaps and making the CPU and GPU coolers depend on warmer, slower-moving internal air.
A glass side panel is normally harmless because it does not block the primary intake. A sealed glass front is more risky. Check the intake area, fan-to-panel clearance, bottom ventilation, side-fan support, and radiator position before buying.
How can I improve airflow in a tempered glass PC case?
Improving airflow in a tempered glass PC case means creating a low-resistance route for cool air to reach the GPU and CPU, using front, side, or bottom fans as intake, using rear and top fans as exhaust, maintaining slightly positive pressure, and removing cable or radiator obstructions from the main airflow path.
Start by cleaning the filters and testing the case with the front panel temporarily removed. Then adjust fan direction and curves. Replace fans only after confirming that the existing intake geometry can actually supply them with air.
Is mesh better than tempered glass for a gaming PC case?
Mesh is generally better than a sealed tempered glass front for gaming PC airflow because its larger open area allows intake fans to move more ambient air at lower speed, but a glass-side or panoramic case can perform similarly when it uses large side intakes, bottom GPU intake, and a well-planned top or rear exhaust path.
The correct comparison is not “glass versus mesh.” It is restricted intake versus unrestricted intake. A glass side panel with a mesh front is often the best compromise for buyers who want both visibility and predictable cooling.
What is the best tempered glass PC case for airflow?
The best tempered glass PC case for airflow is a chassis that keeps glass away from the primary intake, supplies the GPU with direct front, side, or bottom air, supports controlled rear and top exhaust, offers adequate radiator clearance, and provides large filtered openings rather than narrow decorative slots beside the fan blades.
For conventional builds, choose mesh front plus glass side. For panoramic builds, look for at least three bottom intake positions, two or three side intake positions, rear exhaust, top radiator support, and enough clearance beneath the case for unrestricted bottom airflow.
Build for the Heat You Actually Produce
Do not buy a case for the computer shown in the product render. Buy it for the CPU, GPU, radiator, room temperature, workload, and noise level you will actually use.
A tempered glass PC case can look exceptional and cool high-end hardware. But the glass must frame the components, not suffocate them.
Before finalizing your build, compare the planned GPU length, cooler height, radiator stack, fan directions, and intake openings against the case specifications. Then run the front-panel removal test after assembly.
Choose the view. Keep the airflow.