How Long Should You Stress-Test a New AIO Before Shipping a PC?
There is no single duration that suits every build, but there is a defensible way to set one. For a system integrator, an AIO test has to answer three different questions: has trapped air cleared from the pump path, does heat move from the CPU into the loop as designed, and does the cooler stay stable once coolant temperature stops climbing? Each question runs on a different clock. A practical starting point for a per-unit test is about an hour of powered running, with the sustained-load portion extended until CPU and coolant temperatures plateau. Sample units from each batch or design revision deserve a longer session. This guide explains how to build that protocol, what to log, and how to avoid passing a unit that fails after transit.
What Is the Short Answer on AIO Stress-Test Duration?
Run a pump-air check for 30 to 60 minutes, then hold a sustained CPU load until temperatures plateau, with 30 minutes as a sensible floor. Treat these numbers as a starting point for your own QA specification, not as an industry standard.
The published guidance comes from sources written for different purposes:
ASRock's AIO cooler FAQ says a small amount of air in the loop is normal and that bubbles can circulate through the pump after installation. It suggests setting the pump to 100% and running the system for roughly 30 to 60 minutes.
Corsair's guide to rattling or bubbling AIO noise recommends keeping the pump below the highest point of the loop and running the pump's "Extreme" mode for an hour.
OCCT's testing guides list one hour as the minimum CPU test duration for overclock validation and at least 30 minutes of GPU testing to detect throttling under sustained load.
None of these defines a shipping standard for AIO-equipped PCs. The ASRock and Corsair figures describe clearing air for an end user. The OCCT figures describe stability and throttling checks. Combining them gives a reasonable per-unit test, but only your own measurements can confirm that it catches the faults your product actually has.
The three questions map to three time scales:
Air in the pump path: tens of minutes, based on the vendor guidance above.
Thermal plateau: until coolant and CPU temperatures stop rising. This depends on radiator size, fan speed, CPU power, and ambient temperature, so it cannot be a fixed number.
Intermittent faults and stability: hours, applied to samples rather than every unit.
A Practical Burn-In Sequence for a New AIO
The sequence below is a recommended structure. Durations are starting points to calibrate against your own failure data.
Stage 1: Check the mechanical basics before applying load
Spend five to ten minutes before any stress tool starts. Confirm that the BIOS or monitoring software reads pump RPM and radiator fan RPM, that tubes are not kinked or pulled tight, and that the radiator sits above the pump in its intended case position. Verify that the protective film is off the cold plate and that the correct mounting hardware was used for the CPU socket. Catching a missing film or wrong bracket here is cheaper than diagnosing a high-temperature result 40 minutes later.
Stage 2: Purge trapped air for 30 to 60 minutes
Run the pump at the maximum mode the manufacturer officially supports, with the system at idle or light load. Gurgling that fades as air migrates into the radiator is consistent with vendor guidance. Gurgling that returns or persists points toward layout: a pump that is the highest point in the loop, or a front-mounted radiator with its tubes at the top.
To separate pump noise from fan noise, briefly set the radiator fans to 0% at idle, as Corsair's guidance suggests. Never stop the pump to test it. If the noise stays when the fans stop, it is coming from the pump or something it vibrates against. For the full list of causes and escalation signs, see this explanation of what causes AIO cooler gurgling noise.
Stage 3: Hold a sustained CPU load until temperatures plateau
This is the stage most often cut short. A CPU core can reach a high temperature within seconds, but the cold plate, coolant, and radiator have thermal mass and respond more slowly. A five-minute run can show a healthy-looking CPU while the loop is still warming, which makes a marginal unit appear fine.
A workable plateau criterion is that coolant temperature and CPU package temperature each change by no more than about 1°C across a 10-minute window. That threshold is an illustrative starting point, not a standard, and your radiator size and fan profile may justify a different one. Set a minimum of 30 minutes even if the plateau arrives sooner, and a maximum so a unit that never plateaus fails instead of running indefinitely.
If the cooler exposes a coolant sensor, use it. The relationship between the two readings is covered in this guide to coolant temperature versus CPU temperature for fan control. If it does not, rely on CPU package temperature, package power, and fan and pump RPM, and use a fixed, longer duration instead of a plateau test.
Stage 4: Add a mixed CPU and GPU load in the shipping configuration
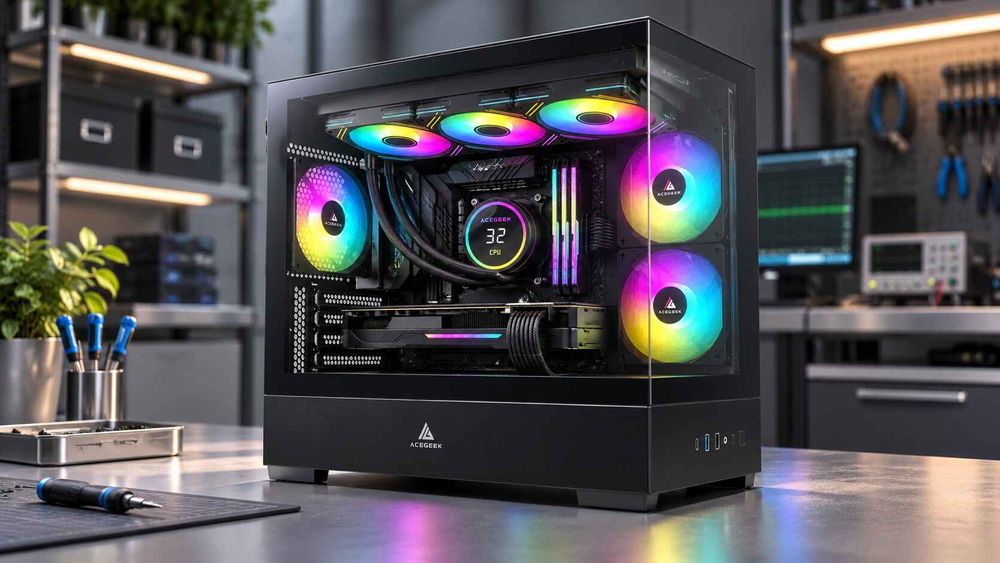
A CPU-only test shows how the AIO performs in isolation. It does not show how the radiator's heat interacts with a hot graphics card. Where the PC has a discrete GPU, run a combined load for the last 15 to 30 minutes. Test with the radiator in the position the customer will receive, because intake and exhaust placement shift heat between the CPU and GPU. The trade-offs are explained in this comparison of radiator intake versus exhaust and how to balance CPU and GPU temperatures.
Stage 5: Sweep fan and pump profiles and listen
Step through idle, mid-load, and full-load fan behavior. Note whether radiator fans repeatedly ramp at idle, whether the pump holds a steady RPM, and whether any tone changes appear. If the controller stores profiles in software rather than hardware, confirm what happens after a reboot, because a unit that ships with a software-dependent profile can behave differently on the customer's first boot.
Stage 6: Cool down, inspect, and pack in the shipping orientation
After the final run, let the system cool, then inspect fittings, tubes, and the radiator for moisture or residue. Record the serial number, test result, and logged data before packing. Pack the PC in the orientation your shipping instructions specify so that what you tested matches what ships.
Why Is a Longer Stress Test Not Automatically Better?
Once the loop reaches thermal equilibrium, additional hours at the same load mostly re-confirm what the first hour showed. Long runs do find intermittent pump faults, unstable memory settings, and marginal power delivery, but those faults occur at low rates. Finding them is a sampling problem, not a reason to add hours to every unit.
Maximum-power synthetic loads also make absolute temperature a poor pass/fail criterion. Intel's processor temperature documentation defines Tjunction max as the junction temperature at which a processor starts using internal thermal controls to reduce power and frequency, and says it varies by product and is usually between 100°C and 110°C. A CPU that reaches its thermal limit under an extreme load is not automatically evidence of a defective cooler. A CPU that throttles at modest power, or that runs well above a known-good reference unit at the same power, is a stronger signal.
There is also a cost. Every extra test hour occupies a test position, power, and technician time across the whole production volume. The exceptions are new design revisions, a changed pump or radiator supplier, or a new cooler-and-case combination. Those justify a long run until the failure data shows the new configuration behaves like the old one.
How Should Test Depth Differ Between Production Units and Samples?
Separate the test into three tiers rather than applying one duration to everything.
Per-unit production test: about an hour of powered running as described above, with logged pass/fail criteria. The goal is catching assembly errors such as poor mounting, a failed pump, a missing fan connection, or air that will not clear.
Batch sample validation: a longer session, such as several hours or overnight, on a defined sample from each batch. The goal is catching intermittent behavior that a short run misses. The sample size and duration are business decisions that depend on your failure rates and return costs.
Design-change validation: a full engineering run on any new cooler, case, radiator position, or firmware profile, including the post-transit check described below.
What Should You Log and How Do You Set Pass/Fail Criteria?
Log enough to explain a result, not just record it. At minimum, capture CPU package temperature, hottest-core temperature, CPU package power, effective clock speed, thermal-throttling status, coolant temperature where available, pump RPM, radiator fan RPM, and room temperature. The distinction between sensors matters, because package and individual-core readings do not measure the same thing. This guide to CPU package temperature versus core temperature for AIO users explains which readings to trust for which purpose.
Room temperature is the variable that quietly ruins comparisons between test days. A unit tested on a cool morning will look better than the same unit on a warm afternoon. Reporting temperature rise above ambient makes results more comparable, as explained in this article on why ambient-normalized temperatures matter in PC case testing. It does not remove differences in CPU power, fan speed, or workload, so keep those fixed or recorded.
The most reliable pass/fail method is comparison against a known-good reference build with the same CPU, power limits, case, radiator position, and fan profile. Set limits as an allowed deviation from that reference rather than a universal temperature. Calibrate the allowed deviation on your own data.
What do common failure signatures usually indicate?
These patterns are diagnostic clues, not confirmed causes:
CPU runs hot while coolant stays comparatively cool under sustained load: possible poor cold-plate contact, thermal paste problems, or a pump or flow issue. Review how mounting pressure affects CPU cooling performance before replacing the cooler, and avoid over-tightening as a fix.
CPU and coolant temperatures both keep climbing without a plateau: check radiator airflow, fan wiring and direction, and pump speed.
Pump RPM erratic or zero: treat as a failure and escalate.
Gurgling that survives a purge: revisit radiator and tube orientation.
Moisture, staining, or residue near fittings: stop testing, disconnect power, and quarantine the unit.
Throttling at modest package power: investigate contact, pump operation, and BIOS power settings.
Does a Pre-Shipment Test Prove the PC Will Work on Arrival?
No. A passed burn-in shows the unit worked before it was packed. It does not show the cooler is unaffected by vibration, drops, tilting, and orientation changes in transit.
ISTA's test procedure overview separates simpler screening tests from general simulation tests, describing the 3-Series as simulations of the damage-producing motions and conditions of a specific transport environment. These evaluate packaging against shipping hazards. They do not certify thermal performance, so they complement a burn-in test instead of replacing it.
A sensible approach is to take sample units through your packaging validation, then repeat the pump-air check and a shortened thermal soak on arrival. Include a step in your setup documentation too. It is a reasonable inference, not a measured rate, that air may redistribute inside a cooler during shipping, so some units may gurgle briefly after delivery. Give customers or deployment teams a short instruction: run the pump at its supported maximum for 30 to 60 minutes, and contact support if the noise persists or temperatures rise.
An illustrative example: an integrator ships a PC with a 360 mm radiator in the front position and tubes at the top. The unit passes a 60-minute burn-in, but several units gurgle after delivery. The test was not wrong. It did not include the orientation and transit conditions that exposed the layout weakness. This is a hypothetical scenario, not a customer case.
What Should You Define Before Approving an AIO Burn-In Specification?
Whether you build PCs in-house or buy assembled systems from an OEM or ODM partner, a burn-in specification is only useful if it is written down and repeatable. Before approving one, define:
Test stages and durations: air purge, sustained load, mixed load, and fan sweep, with minimum and maximum times.
Load tools and settings: the specific stress application, data set or mode, and thread count.
Plateau and pass/fail criteria: reference build, allowed deviation, and throttling rules.
Ambient control: acceptable room temperature range and where it is measured.
Radiator position and orientation: the same as the shipped configuration.
Data retention: logs linked to serial numbers for warranty and RMA analysis.
Sampling plan: which units get the long run, and how many.
Post-transit check: which packaged samples are tested after shipping simulation.
Retest policy: what happens to a unit that fails once and passes on a second run.
When requesting quotes from a supplier, ask them to state these items in writing alongside MOQ, lead time, and warranty terms. A supplier that cannot describe its pass/fail criteria cannot show that its units were tested to a repeatable standard.
Frequently Asked Questions
How long should I stress-test an AIO before shipping a PC?
About an hour per unit is a practical starting point: 30 to 60 minutes of pump-air purge, then sustained load until temperatures plateau, with a 30-minute minimum. Run longer sessions on sampled units. Calibrate durations against your own failure data.
Is a 10-minute stress test enough for a new AIO?
Usually not. CPU temperature responds within seconds, but coolant and radiator temperatures rise more slowly, so a short run may stop before the loop reaches equilibrium. Ten minutes can still work as a quick screen for obvious assembly faults.
Which stress test software should I use?
Use a repeatable CPU load that you can run identically on every unit, plus a combined CPU and GPU load for the final stage. OCCT is one documented option. Monitor with a sensor tool, and keep settings fixed across units.
What CPU temperature should pass an AIO burn-in?
No single temperature fits every CPU. Intel notes that its Tjunction max varies by product and usually falls between 100°C and 110°C. Compare each unit to a known-good reference build at the same power, ambient temperature, and fan profile.
Should I test the AIO with the radiator in the shipping position?
Yes. Radiator position changes both pump air behavior and how heat reaches the GPU. Testing in a different orientation can hide the layout problems customers will see, such as gurgling when the pump is the highest point in the loop.
What if the AIO gurgles after the PC arrives?
Brief gurgling after delivery is consistent with vendor guidance that small amounts of air are normal. Run the pump at its supported maximum for 30 to 60 minutes and check radiator position. If the noise persists or temperatures climb, contact the manufacturer.