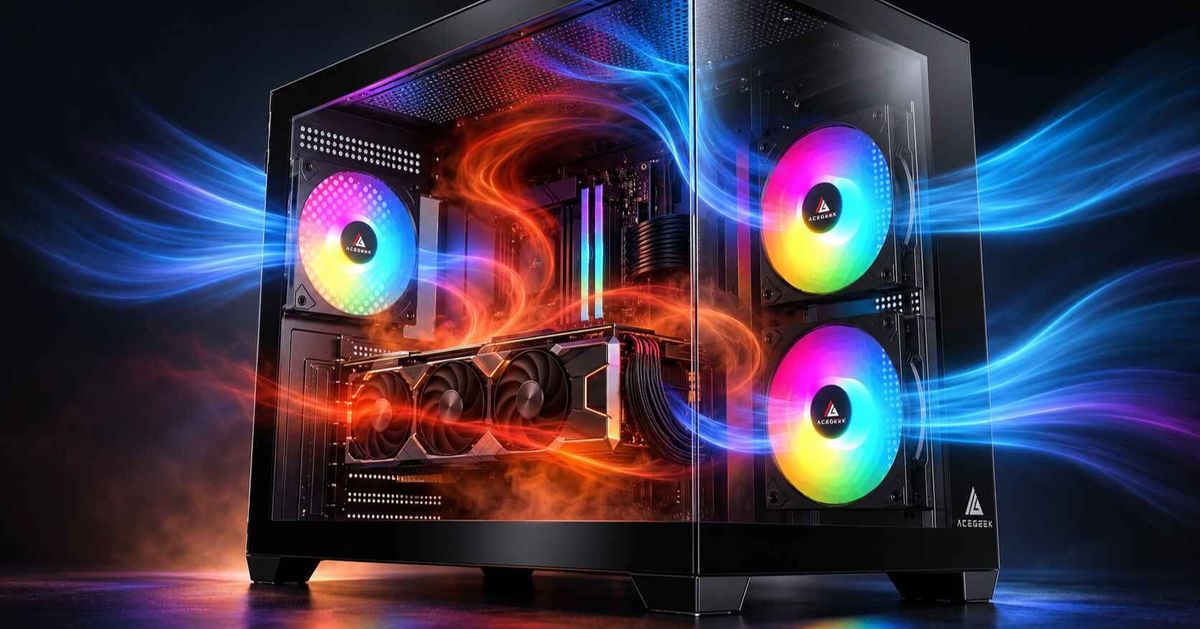
How to Plan Airflow for a Dual-Radiator PC Build
Installing two radiators gives a liquid-cooled PC more potential heat-dissipation capacity. But adding radiator surface area does not automatically guarantee lower CPU and GPU temperatures.
If both radiators receive warm air, airflow is restricted, or heated exhaust is drawn back into the case, the additional cooling hardware may deliver less benefit than expected.
So, what is the best airflow setup for a dual-radiator PC?
For many conventional towers, a front radiator configured as intake and a top radiator configured as exhaust is a practical starting point. In dual-chamber cases, side radiator intake combined with top radiator exhaust can also work effectively, especially when the GPU has a separate fresh-air supply.
However, the ideal layout depends on whether you use two independent AIO coolers or a shared custom water-cooling loop, how much heat your components generate, and where the case allows air to enter and leave.
This guide explains how to plan dual-radiator PC airflow, compare intake and exhaust configurations, avoid clearance problems, and test your finished system for balanced cooling.
What Makes Dual-Radiator Airflow Different?
A single-radiator system has one main liquid-cooling heat exchanger to consider.
A dual-radiator system has two.
Both radiators need sufficient airflow to transfer heat from the coolant into the surrounding environment.
The challenge is that the two radiators may affect each other's inlet air temperature and the airflow available to other components.
For example, a front intake radiator transfers heat into the air entering the case.
A top exhaust radiator may then use some of that warmer internal air to cool its own liquid loop.
This does not automatically make the configuration inefficient, but it illustrates why radiator placement matters.
Two Independent AIOs vs One Custom Loop
Before choosing fan direction, identify the type of liquid-cooling system you are building.
FeatureTwo Independent AIOsShared Custom Cooling LoopCoolant circulationSeparate sealed loopsShared coolant circuitTypical applicationCPU AIO plus GPU AIOCPU and GPU water blocksRadiator relationshipEach radiator cools its own loopBoth radiators contribute to shared heat dissipationPump configurationUsually one pump per AIOOne or more compatible loop pumpsThermal monitoringSeparate liquid temperatures if supportedShared loop temperature monitoringMain planning priorityBalance independent component coolingManage total loop heat load and airflow
With two independent AIOs, one radiator cannot directly increase the liquid-cooling capacity of the other loop.
In a shared custom loop, both radiators contribute to removing heat from the circulating coolant.
However, the temperature of the air entering each radiator still influences its performance.
This distinction is important when selecting fan curves, interpreting temperatures, and deciding where to install each radiator.
Four Dual-Radiator Airflow Configurations Compared
There are several ways to arrange two radiators inside a PC.
The most practical layouts depend on the case's available ventilation and whether the radiators are used as intake or exhaust.
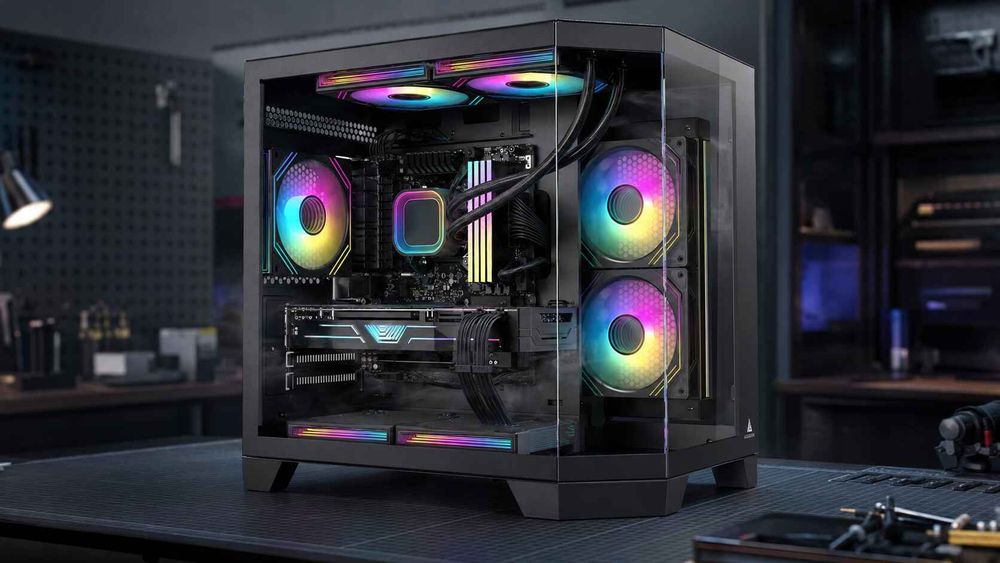
Dual-Radiator Layout Comparison
Radiator ConfigurationMain AdvantageMain Trade-OffUseful ApplicationFront intake + top exhaustOne radiator receives outside air while the other removes heat from the chassisTop radiator uses warmer internal airConventional gaming towersSide intake + top exhaustFlexible airflow in dual-chamber casesSide radiator can warm the main chamberPanoramic and dual-chamber buildsBoth radiators as intakeBoth can receive relatively cool outside airMore radiator heat enters the caseSelected liquid-cooled systems with strong exhaustBoth radiators as exhaustRadiator heat is discharged outsideBoth may use warmer internal airCases with sufficient independent fresh-air intake
No configuration is universally better.
The objective is to give both radiators useful airflow while maintaining suitable temperatures throughout the system.
Layout 1: Front Intake and Top Exhaust
For a conventional mesh-front tower, front radiator intake combined with top radiator exhaust is a reasonable starting configuration.
The airflow paths are:
Front: Outside Air → Radiator → Case Interior
Top: Case Interior → Radiator → Outside Air
The front radiator receives relatively cool room air.
The top radiator removes heat through the roof of the chassis.
A rear exhaust fan may provide additional heat removal when supported by the overall airflow configuration.
Why This Layout Can Work Well
The arrangement creates a relatively straightforward intake-to-exhaust path.
It also avoids forcing both radiators to discharge heated air into the main compartment.
However, the front radiator can warm air before it reaches components inside the case.
For a system containing an open-air graphics card, this may affect GPU cooling.
A lower front intake path or separate bottom intake can help supply fresh air toward the graphics card.
What Does Independent Testing Show?
Puget Systems tested multiple radiator configurations in the Fractal Design Define XL R2.
In its 2013 testing, using both radiators as intake produced lower CPU temperatures but higher GPU temperatures than a configuration with front radiator intake and top radiator exhaust.
ConfigurationCPU TemperatureGPU TemperatureBoth radiators as intake66°C85°CFront intake + top exhaust69°C78°CDifference after changing layout+3°C−7°C
Source: Puget Systems — Fractal Design Define XL R2 Review.
These are historical measurements from a particular chassis, cooling configuration, and hardware generation. They are not expected temperature differences for modern dual-radiator systems.
Nevertheless, the test illustrates an important principle.
A layout that delivers the lowest CPU temperature may not provide the most balanced cooling for the entire PC.
For more information about the underlying airflow trade-off, read our guide to radiator intake vs exhaust and CPU/GPU temperature balance.
Layout 2: Side Intake and Top Exhaust
Side radiator intake combined with top radiator exhaust is especially relevant to panoramic and dual-chamber PC cases.
These chassis frequently use glass front panels and place their main intake openings beside the motherboard.
A typical arrangement is:
Side radiator: Intake.
Top radiator: Exhaust.
Bottom fans: Intake, where supported and beneficial.
Rear fan: Exhaust, where supported.
This configuration can provide a practical cooling path while preserving the panoramic appearance of the main chamber.
Why Bottom Intake Can Matter
A side intake radiator transfers heat into the air entering the case.
If the graphics card uses an open-air cooler, that warmed air may reach its heatsink.
Bottom intake fans can provide a separate source of outside air near the GPU.
However, their effectiveness depends on the case's ventilation openings, dust filters, floor clearance, and GPU positioning.
For a fully liquid-cooled graphics card, direct airflow into the GPU heatsink is no longer the same priority, but motherboard components, memory, SSDs, and other hardware still need adequate ventilation.
Side Radiator Restrictions
Some cases provide generous side radiator mounting space but relatively narrow external ventilation openings.
This can increase airflow resistance.
A restrictive dust filter or panel can also reduce the amount of air reaching the radiator.
Before choosing side intake, check the actual ventilation design rather than relying only on the number of supported fan positions.
Our article on the pros and cons of side-mounting an AIO radiator explains these installation trade-offs in greater detail.
Layout 3: Both Radiators as Intake
Configuring both radiators as intake allows each to receive outside air, provided their external ventilation openings are unobstructed.
This may improve radiator heat-transfer conditions compared with using warmer internal case air.
For systems with two independent AIOs, both cooling loops may benefit from the lower radiator inlet air temperature.
For a shared custom loop, the additional heat-exchange potential can also be useful.
However, there is an important trade-off.
Where Does the Radiator Heat Go?
Both radiators release heat into the main chamber.
That heat must then leave through other exhaust openings.
If the case cannot remove it effectively, internal air temperature may increase.
Potentially affected components include:
Motherboard VRM heatsinks.
Memory modules.
M.2 SSDs.
Power-delivery components.
Graphics cards using open-air cooling.
Other components exposed to the case's internal air.
A system may display favorable coolant temperatures while other components operate in a warmer environment.
This does not mean both-intake is always a poor choice.
It means the configuration requires adequate exhaust capacity and monitoring beyond CPU temperature alone.
For a CPU-and-GPU custom loop, both-intake can be worth evaluating when the case offers effective exhaust ventilation and the remaining components receive sufficient airflow.
Layout 4: Both Radiators as Exhaust
Both-exhaust configurations remove radiator heat directly from the enclosure.
This can be useful when the chassis provides sufficient fresh air through independent intake openings.
For example, a case with extensive bottom and front intake ventilation may supply air to the main chamber while top and side radiators exhaust heat.
The main disadvantage is that both radiators may receive air already warmed by internal components.
This can reduce the temperature difference between the coolant and the air entering the radiators.
As a result, radiator fans may need to run faster to provide equivalent cooling.
Do Two Exhaust Radiators Create Negative Pressure?
Not necessarily.
Case pressure depends on the actual airflow entering and leaving the chassis.
Radiator fins, filters, fan speeds, and panel restrictions can all change airflow volume.
A pair of exhaust radiators does not automatically guarantee negative pressure if other intake fans provide sufficient airflow.
Likewise, two intake radiators do not guarantee positive pressure.
Do not determine pressure balance by counting fans alone.
Instead, prioritize an effective airflow path, filtered intake where practical, and stable component temperatures.
How Should You Choose the Layout for Your Hardware?
The ideal configuration depends on how heat is distributed across your components.
Gaming PC With a CPU AIO and Open-Air GPU
A gaming system with a CPU AIO and an air-cooled graphics card needs suitable airflow for the GPU.
If the CPU radiator operates as intake, consider whether the graphics card also receives fresh air from another ventilation path.
A top exhaust radiator may reduce how much CPU radiator heat enters the main chamber.
However, the CPU cooler must still provide sufficient capacity.
Gaming PC With Separate CPU and GPU AIOs
Two independent AIOs introduce a different trade-off.
Each radiator cools its own component, but their intake air temperatures can affect each other.
For example, a side-mounted GPU AIO may receive outside air while a top-mounted CPU AIO exhausts through the roof.
Another supported configuration could reverse those roles.
The preferable arrangement depends on the processor's sustained heat output, GPU power, radiator design, and available case ventilation.
Do not assume that a GPU AIO always belongs in one particular location.
Custom Loop Cooling Both CPU and GPU
In a shared custom loop, both radiators help dissipate heat from the circulating coolant.
The important considerations include:
Combined sustained CPU and GPU heat output.
Total effective radiator capacity.
Radiator inlet air temperature.
Coolant flow rate.
Pump operation.
Fan performance under resistance.
Case intake and exhaust ventilation.
Acceptable coolant and component temperatures.
Radiator sizing and airflow planning are related, but they solve different problems.
Increasing radiator area can improve potential heat dissipation, while choosing an effective airflow layout helps that radiator area perform as intended.
The coolant routing order may also influence local temperatures, especially at low flow rates.
However, in a properly designed loop with adequate flow, practical routing, reliable pump supply, and sufficient radiator capacity are often more important than optimizing every component's position in the sequence.
See Corsair's explanation of custom-loop order for examples of how coolant flow rate affects temperature differences.
How to Verify Dual-Radiator Compatibility Before Buying
A PC case may support two radiator positions on its specification sheet without accommodating every possible combination of radiators, fans, motherboard components, and tubing.
You must verify the complete installed configuration.
Calculate Radiator and Fan Thickness
A radiator's nominal size, such as 240mm or 360mm, describes its fan mounting class rather than its thickness.
For example:
ComponentExample AExample BRadiator thickness27mm38mmFan thickness25mm25mmNominal assembly thickness52mm63mm
These values are illustrative.
The total installed space may also need to accommodate fittings, mounting hardware, vibration pads, and cable routing.
Do not assume that every case supporting a 360mm radiator has enough room for a thick radiator combined with 30mm fans.
Check the Top Radiator Area
Common top-mounting conflicts include:
Tall RAM modules.
Motherboard VRM heatsinks.
Rear I/O covers.
CPU EPS power cables.
Radiator end tanks.
Tube fittings.
Rear exhaust fans.
The case's mounting offset and internal clearance matter as much as the radiator's overall dimensions.
For a more detailed measurement process, see our top-radiator clearance guide.
Check the Side or Front Radiator Area
Front and side radiators introduce different restrictions.
A front radiator may reduce the usable GPU length depending on the chassis.
A side radiator may interfere with nearby power cables, motherboard components, or the case's secondary chamber.
In a custom loop, the reservoir and pump also need secure mounting positions.
For two independent AIOs, verify the permitted radiator positions and tubing arrangements for both coolers.
Do not assume that every AIO supports every installation orientation.
Plan Filling, Draining, and Maintenance
For a custom loop, consider how the system will be filled, bled, drained, and serviced.
Where required, arrange the reservoir so the pump receives coolant reliably.
Plan accessible fill and drain points and use compatible components and coolant.
For sealed AIOs, follow the manufacturer's installation and maintenance instructions rather than attempting to integrate their sealed loops into a custom circuit.
Real Case Example: ACEGEEK Mercury R425X RGB
The ACEGEEK Mercury R425X RGB provides a useful example of a case with multiple radiator mounting options.
Its published specifications include:
SpecificationACEGEEK Mercury R425X RGBCase dimensions425 × 280 × 420mmMotherboard supportATX / M-ATX / ITXMaximum GPU clearance410mmTop radiator support360mmSide radiator support360mmTop fan support3 × 120mmSide fan support3 × 120mmBottom fan support3 × 120mmRear fan support1 × 120mm
These specifications make the chassis a relevant candidate for planning side and top radiator configurations.
For example, a proposed layout could use a side radiator as intake, a top radiator as exhaust, and compatible bottom intake fans.
However, support for two radiator mounting positions does not independently prove that every pair of 360mm radiators can be installed simultaneously.
Before purchasing, confirm the specific radiator dimensions, fan thicknesses, tube fittings, and motherboard clearances.
The product specifications establish available mounting options, not verified thermal performance for a completed dual-radiator build.
How Should You Choose Radiator Fans and Fan Curves?
Radiator airflow is affected by more than fan diameter and maximum RPM.
Radiator fins create resistance, and additional dust filters or restrictive panels can increase it further.
A radiator fan should maintain useful airflow against that resistance.
Why Maximum CFM Is Not Enough
CFM describes airflow volume, commonly measured under specified test conditions.
However, the airflow delivered through a radiator may be considerably lower than the fan's maximum free-air rating.
Static pressure provides another reference, but maximum static pressure alone does not determine cooling performance either.
A pressure-airflow performance curve gives a more complete picture of fan behavior.
For radiator applications, compare airflow performance under relevant restrictions and at realistic operating noise levels.
Should Both Radiators Use the Same Fan Curve?
Not always.
For a shared custom loop, the radiators generally respond to the same circulating coolant temperature, so a common coolant-based control strategy can be a useful starting point.
However, the two radiator locations may have different airflow resistance.
A side radiator behind a restrictive filter may need a different fan-speed profile from a relatively open top radiator.
For two independent AIOs, each radiator may use its own coolant temperature or other manufacturer-supported control input.
Do not assume that one temperature sensor is available to every controller.
Why Coolant Temperature Can Be Useful
Coolant temperature usually changes more gradually than CPU core temperature.
This can make it a useful control input for radiator fans because short processor temperature spikes do not necessarily require an immediate large increase in airflow.
However, the cooling system must still maintain the manufacturer's required operating limits.
Pump settings and thermal protection should be configured separately according to the cooling hardware's specifications.
For practical fan-control guidance, read our article on coolant temperature vs CPU temperature for fan control.
How to Test Whether Your Dual-Radiator Airflow Works
After assembly, the most important step is to measure how the completed cooling system performs.
A diagram can suggest a useful airflow path, but it cannot establish the actual temperature result.
The most reliable approach is to compare configurations under controlled conditions.
Step 1: Establish a Baseline
Record the current radiator positions, fan directions, and control settings.
Keep the case panels and dust filters installed as they would be during normal operation.
Step 2: Monitor the Relevant Measurements
MeasurementWhat It Helps EvaluateCPU package temperatureProcessor cooling performanceCPU package powerActual CPU workloadGPU temperatureGraphics card coolingGPU hotspot temperatureLocal GPU thermal behavior, where availableGPU power consumptionActual graphics workloadCoolant temperatureLiquid-loop cooling performanceRadiator fan RPMAirflow control behaviorPump RPM or flow rateCooling-loop operationMotherboard and SSD temperaturesInternal case thermal conditionsAmbient temperatureEnvironmental differencesSystem noiseAcoustic trade-offs
For independent AIO systems, monitor both coolant temperatures when the sensors are available.
Step 3: Run Repeatable Workloads
Use workloads that reflect the PC's intended purpose.
For example:
CPU-Heavy Test
A sustained CPU workload reveals whether processor cooling is sufficient.
GPU-Heavy Test
A graphics-intensive workload helps evaluate GPU cooling and its effect on internal case temperature.
Combined Workload
A sustained CPU and GPU workload is especially useful for evaluating the full dual-radiator arrangement.
Allow enough time for the liquid cooling system to approach a relatively stable temperature.
Short benchmarks may not capture changes in coolant temperature or heat accumulation inside the chassis.
Step 4: Change One Variable at a Time
If possible, begin by changing only one radiator's fan direction.
Keep the radiator positions, pump settings, and other fan speeds unchanged.
Repeat the same workloads.
If the radiator must be moved to another location, recognize that the comparison now includes changes in mounting position and surrounding airflow, not just fan direction.
Step 5: Evaluate Overall Cooling and Noise
A successful change does not necessarily produce the lowest CPU temperature.
It may instead deliver:
More stable coolant temperatures.
Lower GPU temperatures.
Reduced GPU fan speed.
Lower overall noise.
Improved sustained performance.
Better motherboard or SSD cooling.
Consider these results together.
For example, a small coolant temperature improvement may not justify a substantial noise increase or an undesirable rise in motherboard temperatures.
The best configuration is the one that maintains suitable performance across the complete system.
Common Dual-Radiator Airflow Mistakes
Restricting One Radiator's Intake
A radiator mounted behind a dense filter or narrow ventilation opening may struggle to receive sufficient air.
Adding more fans cannot always overcome poor external ventilation.
Inspect the complete intake path before changing radiator hardware.
Allowing Heated Exhaust to Reenter an Intake
Radiator exhaust can sometimes circulate back toward a nearby intake opening.
This may happen when the case is positioned close to furniture or when exhaust and intake vents are close together.
Ensure heated air has a clear route away from the chassis.
Ignoring Cooling for Non-Liquid-Cooled Components
Water cooling the CPU and GPU does not remove the need for case ventilation.
Motherboard VRMs, memory, SSDs, and other components still release heat.
A fully liquid-cooled system should maintain adequate airflow around these components.
Assuming More Radiator Fans Always Improve Performance
Additional push-pull fans can increase airflow capability through some restrictive radiators.
However, they also increase thickness, electrical demand, cost, and potential noise.
Use push-pull only when the radiator, case clearance, and measured cooling benefit justify the extra fans.
Using Incompatible Fan or Pump Settings
Radiator fans and pumps may have different operating requirements.
Do not apply an aggressive low-speed fan profile to a pump unless the manufacturer explicitly supports that configuration.
Make sure all fan controllers and power connections are compatible with the connected hardware.
Frequently Asked Questions
1. Can One Radiator Exhaust Warm Air Into Another Radiator's Intake?
Yes.
Depending on case geometry, one radiator may exhaust heated air into a region from which another radiator draws its intake air.
This can reduce the second radiator's heat-transfer effectiveness because the incoming air is warmer.
External recirculation can also occur when exhaust outlets and intake openings are positioned close together.
To investigate, monitor coolant temperatures, ambient temperature, and radiator fan behavior under a sustained workload.
Check whether changing fan direction or improving the exhaust path reduces the problem.
2. Can I Use Two Different Radiator Sizes in One Custom Loop?
Yes, provided the radiators and other cooling components are compatible.
For example, a shared custom loop may use a 360mm radiator and a 240mm radiator.
Both contribute to heat dissipation from the circulating coolant.
However, the total cooling result depends on radiator design, airflow, coolant flow rate, fan performance, and heat load.
Using two different radiator sizes is not inherently a problem.
Choose the combination based on available case space, cooling requirements, and practical tubing arrangements.
3. Why Is My Coolant Temperature High With Two Radiators?
High coolant temperature can have several causes.
The combined heat load may exceed the cooling system's effective capacity at the selected fan speeds.
One or both radiators may also receive warm or restricted airflow.
Other possibilities include insufficient coolant flow, incorrect fan orientation, pump problems, dust buildup, or inadequate case exhaust.
Compare coolant temperature with room temperature and the actual CPU/GPU power consumption.
Then inspect radiator airflow and cooling-loop operation before assuming that additional radiator area is required.
4. Should Both Radiators Follow the Same Fan Curve?
For a shared custom loop, both radiators can use coolant temperature as a common control reference.
However, their fan-speed profiles do not necessarily need to be identical.
A restrictive intake radiator may require more fan speed than an open exhaust radiator to deliver useful airflow.
For two independent AIOs, the appropriate control source and fan curve may differ between the two loops.
Use manufacturer-supported sensors and controllers, and verify cooling performance under realistic workloads.
5. Do I Need Push-Pull Fans on Both Radiators?
No.
A push-pull configuration places fans on both sides of a radiator to move air in the same overall direction.
This can be beneficial with some thick or restrictive radiators.
However, it is not automatically necessary for a dual-radiator system.
A single row of suitable fans may provide adequate cooling with less noise, lower cost, and easier installation.
Before adding push-pull fans, verify the available space and compare performance under controlled conditions.
6. How Can I Test Whether Changing One Radiator's Direction Helps?
Record CPU temperature, GPU temperature, coolant temperature, component power, fan speeds, and room temperature before making changes.
Then reverse one radiator's airflow direction while keeping other settings as consistent as possible.
Repeat the same sustained workloads.
Compare the resulting coolant and component temperatures, thermal-throttling behavior, and operating noise.
If the change improves one temperature but worsens another, evaluate the overall effect rather than selecting the layout based on a single reading.
Build a Dual-Radiator Airflow Path That Works Together
A dual-radiator PC can provide substantial cooling capacity, but radiator quantity alone does not determine thermal performance.
Both radiators need adequate airflow, suitable fan control, and an effective path for removing heat from the system.
For conventional towers, front radiator intake combined with top radiator exhaust is a practical starting point.
For panoramic and dual-chamber cases, side intake and top exhaust can offer a similarly useful arrangement, particularly when the case provides independent fresh-air intake.
However, two independent AIOs and a shared custom loop have different cooling relationships and control requirements.
Before purchasing hardware, verify radiator thickness, fan dimensions, tubing clearance, pump requirements, and the actual installation space available.
After assembly, use repeatable CPU, GPU, and combined workloads to evaluate temperatures and noise.
The best dual-radiator setup is the one that allows both radiators to dissipate heat efficiently while keeping the entire PC cool, stable, and reasonably quiet.