Mini-ITX Case Compatibility Checklist for High-Power Builds
Small gets complicated.
A high-power Mini-ITX build compresses the GPU, CPU cooler, PSU, motherboard, storage, cables, fans, radiator, memory, and their combined heat output into a space where moving one component 10 or 15 millimeters can determine whether another component fits at all.
So why do buyers still start with case volume?
I wouldn't.
When I assess Mini-ITX case compatibility, I treat the manufacturer's motherboard-support line as the beginning of the investigation, not the conclusion. “Supports Mini-ITX” tells me that a 170 mm-class motherboard mounting pattern belongs there. It says almost nothing about the graphics card, power cable, radiator, pump block, SFX power supply, RAM, or airflow configuration that will surround it.
That distinction matters more now because desktop hardware has become remarkably power-dense.
NVIDIA's GeForce RTX 5090 specifications list the Founders Edition at 304 mm long, 137 mm wide, two slots and 575 W Total Graphics Power. NVIDIA also warns that add-in-board dimensions vary by manufacturer.
At the other end of the socket, AMD lists the Ryzen 9 9950X3D at 16 cores, 32 threads, up to 5.7 GHz and a 170 W default TDP.
Put hardware in that class into a genuinely compact chassis and the question changes.
It is no longer:
“Does this Mini-ITX PC case support my motherboard?”
It becomes:
“Can every component occupy its required three-dimensional space, receive enough electrical power, reject enough heat, and still be removed later without dismantling the entire computer?”
That is the checklist that matters.
Mini-ITX Case Compatibility Starts With Geometry, Not Liters
The first number shoppers usually quote is case volume.
10 liters. 15 liters. 20 liters.
Interesting number. Poor compatibility test.
Two cases with similar external volume can use completely different internal layouts. One might place the PSU beside the motherboard. Another may sandwich the GPU behind it with a PCIe riser. Another may move the power supply toward the front and reserve the roof for a radiator.
Those layouts change everything.
ACEGEEK's guide on whether small cases can fit high-end GPUs reaches the same practical conclusion: GPU length alone does not determine whether a high-end graphics card works inside a compact chassis. Slot thickness, cable space, intake access, PSU capacity and exhaust routing all matter.
Check the Motherboard Format First
Yes, start here.
A Mini-ITX case must support the Mini-ITX motherboard mounting layout, but then inspect what surrounds the motherboard:
CPU socket position
EPS power connector location
M.2 heatsink height
VRM heatsink dimensions
rear I/O shroud height
RAM position
front-panel header location
fan-header accessibility
SATA connector orientation
PCIe riser path, if used
Accessibility matters.
I have seen compatibility logic reduced to “the motherboard fits, therefore the build fits.” That is lazy reasoning. A header located under a radiator, behind the GPU or against the PSU may technically exist while becoming practically unusable.
Never Judge GPU Fit From Length Alone
This is probably the biggest Mini-ITX case buying mistake.
A graphics card has at least four dimensions that matter:
Length
Height or width from the PCIe edge
Thickness
Power-connector protrusion
Then you have installation geometry.
A 304 mm GPU fitting into a case rated for 305 mm does not give you one millimeter of useful engineering margin. It gives you a puzzle.
ACEGEEK's guide to choosing a PC case for large triple-fan GPUs makes an important distinction between published GPU clearance and the room left after fans, radiators, cables and airflow requirements are considered.
I would apply an even harsher rule to a high-power Mini-ITX case.
Do not buy to the maximum specification.
If your card is 304 mm long, I would rather see meaningful spare space than a chassis specification of 305 mm. You may need room to angle the card during installation. A front fan may occupy part of the published clearance. The card's end plate may extend beyond the PCB. And future removal should not require stripping the case back to bare steel.
That extra room is not wasted.
It is serviceability.
The High-Power Mini-ITX Compatibility Table
Here is the checklist I would actually use before ordering parts.
Compatibility AreaWhat to MeasurePractical TargetRed FlagMotherboardExact supported form factorExplicit Mini-ITX support“Compact motherboard support” without dimensionsGPU lengthPhysical card lengthMeaningful margin beyond GPU lengthCard equals case maximumGPU thicknessSlots or millimetersSpace for cooler plus intake gapGPU pressed against solid panelGPU widthPCIe edge to outer cooler edgeRoom for power connector and side panelConnector touches panelGPU power cableConnector + bend/routing zoneNatural bend without panel pressureCable sharply folded at connectorPSUSFX or SFX-L dimensionsExact PSU format confirmedAssuming SFX-L fits because SFX doesPSU wattageGPU + CPU + system demandFollow GPU/PSU guidance with headroomBuying by wattage aloneCPU coolingCooler height or radiator envelopeVerified against board, RAM and PSUChecking radiator length onlyRAMDIMM heightClear of radiator/fans/tubesTall RAM directly below radiatorIntakeOpen area near GPUDirect access to cool outside airGPU fans face solid panelExhaustHeat escape pathDefined top/rear/side exhaustMultiple intakes with no exitStorageM.2/2.5-inch installation positionAccessible after assemblyDrive hidden behind PSU/GPUCable routing24-pin, EPS, GPU, SATA, front I/ORouting path planned before assemblyCables share fan-blade spaceService accessGPU/PSU/cooler removal sequenceMajor parts independently removableFull teardown for minor service
That last line receives almost no attention.
It should.
A compact PC that benchmarks beautifully but requires radiator removal just to access the motherboard battery is not elegant engineering. It is mechanical debt.
Mini-ITX GPU Clearance Is Now a Power-Cable Problem Too
Here is where modern Mini-ITX GPU clearance gets uncomfortable.
The GPU can physically fit and the side panel can still refuse to close safely.
Why?
The power connector.
Intel's desktop power-supply design documentation describes the 12V-2x6 auxiliary connector as capable of delivering up to 600 W of 12 V power to a PCIe add-in card. The connector also incorporates sense contacts used for power capability and connection signaling.
That is serious current passing through one compact connection.
So I strongly dislike builds where the GPU's power cable exits the connector and immediately gets crushed against the side panel.
Technically connected?
Perhaps.
Good design?
No.
Measure Side-Panel Clearance After the Connector
Do not measure only the card.
Measure:
motherboard/GPU position → GPU body → connector → cable routing → side panel
The connector itself may fit while the cable does not.
And this is exactly why a wider case can sometimes be more useful than a longer one.
For a deeper discussion of upgrading around graphics-card dimensions rather than marketing labels, see ACEGEEK's future-proof PC case guide for GPU upgrades. It separates GPU length, thickness, cable space and cooling rather than pretending one clearance number solves everything.
RTX 5090 Is a Useful Stress Test
I am not suggesting every Mini-ITX gaming PC needs an RTX 5090.
Quite the opposite.
But it makes an excellent compatibility stress test.
NVIDIA lists its RTX 5090 Founders Edition at:
304 mm length
137 mm width
2-slot design
575 W TGP
The same official page notes that board-partner designs can differ.
That last point is important.
Never search:
“Does this case fit an RTX 5090?”
Search:
“Does this case fit my exact RTX 5090 model number?”
Those are completely different questions.
An NVIDIA Founders Edition dimension does not certify an ASUS, MSI, Gigabyte, Zotac, PNY or another manufacturer's card.
Exact SKU first.
Always.
Mini-ITX PSU Compatibility: SFX and SFX-L Are Not the Same Thing
The power supply creates another trap.
Buyers see “small-form-factor PSU” and stop reading.
Bad idea.
SFX and SFX-L consume different amounts of internal length.
Corsair's own SF1000 versus SF1000L comparison lists the SF1000 SFX unit at 100 × 125 × 63.5 mm, while the SFX-L model is 130 × 125 × 63.5 mm. That is a 30 mm length difference inside a case where 30 mm can destroy your cable-routing plan.
Thirty millimeters.
Huge difference.
An SFX-L unit can intrude into GPU cabling, radiator tubing, storage brackets or the very cavity you planned to use for excess modular cable.
High Wattage No Longer Requires a Large ATX PSU
This part has changed dramatically.
Corsair currently offers an ATX 3.1, PCIe 5.1-ready SF1000 in the 100 × 125 × 63.5 mm SFX format. Cooler Master's V SFX Platinum 1100 ATX 3.1 is also listed at 100 × 125 × 63.5 mm.
So a high-power Mini-ITX build is no longer automatically blocked by PSU wattage density.
But do not celebrate yet.
Higher power density means the thermal environment around the PSU matters more, not less.
A 1000 W sticker does not create cool air.
Check These PSU Details
Before approving Mini-ITX PSU compatibility, verify:
SFX versus SFX-L support
exact PSU length
modular connector orientation
GPU cable type
EPS connector count
cable length
cable flexibility
PSU fan intake direction
exhaust clearance
removable drive-cage conflicts
12V-2x6 cable routing
I also prefer native modern GPU cabling when the selected GPU and PSU support it rather than planning a dense adapter bundle in a case that already has nowhere to hide cable mass.
Fewer connections usually make packaging easier.
Cooling a High-Power Mini-ITX Gaming PC Is an Airflow Problem Before It Is a Cooler Problem
Here is the uncomfortable part.
A buyer can spend heavily on an AIO and still build a thermally poor Mini-ITX PC.
Why?
Because coolers do not delete heat.
They move it.
An RTX 5090-class 575 W GPU and a Ryzen 9 9950X3D-class 170 W CPU illustrate how quickly theoretical component heat can stack up in a high-end system. Those figures are manufacturer ratings, not a prediction that both components will sit permanently at their maximum simultaneously, but they show why compact airflow planning cannot be treated casually.
The heat still has to leave the chassis.
Air Cooler or AIO?
I would make this decision after selecting the case and GPU.
Not before.
For an air-cooled CPU, verify:
maximum CPU cooler height
RAM clearance
VRM heatsink clearance
fan direction
distance to GPU backplate
exhaust fan relationship
PSU obstruction
For an AIO, verify:
radiator length
radiator width
radiator thickness
fan thickness
tube exit direction
pump/block height
RAM interference
VRM heatsink interference
EPS cable access
GPU interference
PSU interference
A case saying “supports 240 mm radiator” is nowhere near enough information.
ACEGEEK's article on why top-mounted radiators can interfere with RAM shows exactly why radiator support is a three-dimensional issue involving radiator thickness, fan depth, motherboard position, VRM hardware and DIMM height.
Do the Stack-Up Math
Suppose your radiator is around 27 mm thick and its fans are 25 mm thick.
That cooling stack is already roughly:
27 mm + 25 mm = 52 mm
before accounting for screw heads, brackets, tube fittings or chassis offsets.
Now ask where those 52 mm extend.
Toward the RAM?
Toward the motherboard heatsinks?
Toward the GPU?
Toward the PSU?
That is how a compatibility checklist should work.
Not:
“240 mm supported. Good.”
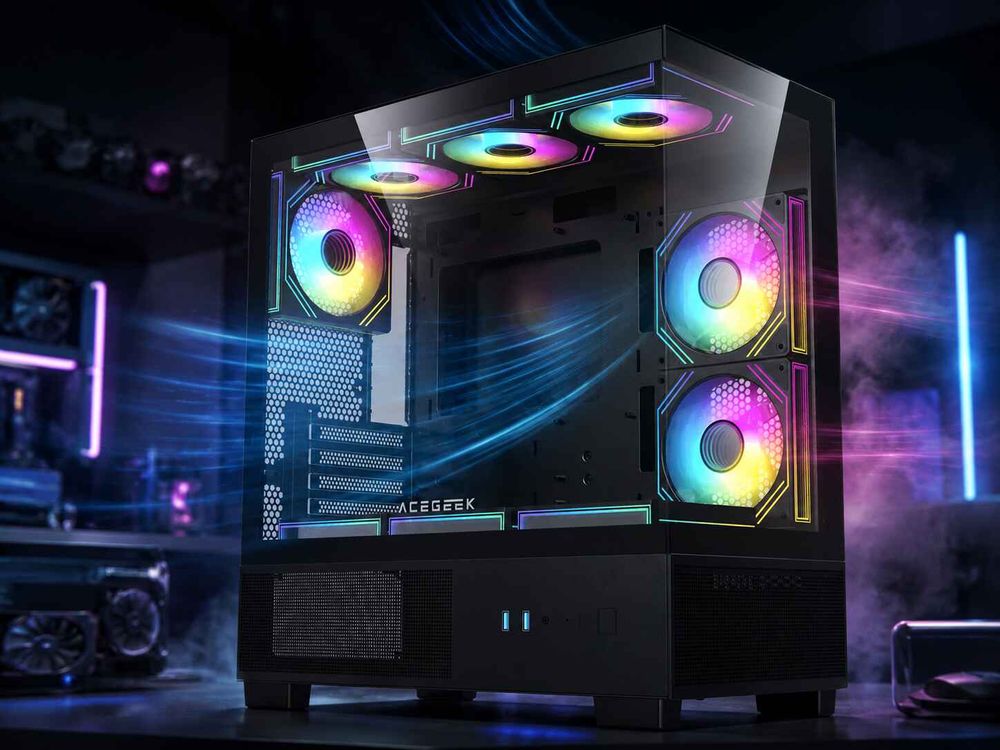
Airflow Is Where Small Form Factor PC Cases Win or Lose
Size alone does not make a PC run hot.
Bad airflow does.
ACEGEEK's analysis of the real impact of case size on cooling performance makes a useful point: larger cases provide more potential cooling margin, but the layout still has to use that space effectively.
I agree.
A intelligently vented small form factor PC case can outperform a larger case that hides its fans behind decorative panels.
But high-power Mini-ITX gives you less margin for mistakes.
Give the GPU Fresh Air
For gaming builds, the GPU is often the component I would design the airflow path around first.
Ask:
Where do the GPU fans get outside air?
Is a vent directly beside them?
How restrictive is the dust filter?
How much space exists between GPU fans and the panel?
Is the GPU exhausting heat into the PSU?
Can hot exhaust recirculate into the intake?
Does a bottom intake actually have clearance beneath the case?
More fans do not automatically answer those questions.
Air has to enter somewhere.
And it has to leave somewhere.
In layouts that rely heavily on side intake, the principles in ACEGEEK's side-intake airflow guide remain useful even though the article discusses panoramic cases: intake should feed the hot components directly, while top or rear exhaust provides a controlled route for heated air to escape.
Do Not Suffocate a Three-Slot GPU
This deserves more attention.
Imagine a GPU that fits the chassis mechanically but sits only a few millimeters from a solid side panel.
Congratulations.
It fits.
And its fans are now trying to inhale through a wall.
Mechanical compatibility and thermal compatibility are separate tests.
A good Mini-ITX case must pass both.
The Compatibility Order I Would Use for a High-Power Build
People often choose components in the wrong sequence.
They buy the CPU.
Then GPU.
Then motherboard.
Then cooler.
Then PSU.
And finally they go hunting for a Mini-ITX case capable of containing the accident.
I prefer the opposite approach.
Step 1: Lock the GPU SKU
Write down:
exact model
length
width
thickness
slot count
power connector
recommended PSU
cable exit direction
Do not use the reference GPU specification when buying a partner card.
Step 2: Choose the Mini-ITX Case Layout
Decide whether you want:
conventional layout
sandwich layout
vertical GPU
horizontal GPU
riser-based layout
side-mounted PSU
front-mounted PSU
The architecture determines almost every later compatibility decision.
Step 3: Check GPU Installation, Not Just GPU Clearance
Ask whether the GPU can actually enter the chassis.
Sometimes the stated maximum fits only after removing:
frame rails
front panel
PSU
radiator
fan bracket
support bracket
That is not necessarily bad.
But you should know before assembly day.
Step 4: Pick the PSU Form Factor
If the case supports only SFX, buy SFX.
If it accepts SFX-L, decide whether the additional 30 mm length is worth its impact on cables and cooling.
Do not improvise.
Step 5: Map Every Power Cable
Plan:
24-pin ATX
CPU EPS
GPU power
SATA power
fan controller
RGB controller
pump power
Use the route each cable will actually take.
Step 6: Select CPU Cooling
Now you know what space remains.
This is when I would choose between:
low-profile air cooler
tower air cooler
120 mm AIO
240 mm AIO
280 mm AIO, where supported
Step 7: Check RAM and VRM Interference
Tall RGB memory can turn a valid radiator configuration into an invalid one.
Motherboard heatsinks can do the same.
Measure them.
Step 8: Build the Airflow Path on Paper
Mark:
intake → GPU/CPU → exhaust
If you cannot draw a logical path, adding another RGB fan is not going to rescue the design.
Step 9: Check Storage Last
M.2 storage is useful in Mini-ITX because it removes drive trays and cables.
But verify whether installing or replacing the rear M.2 drive requires motherboard removal.
That matters later.
Step 10: Simulate Maintenance
This is my favorite test.
Ask what happens if you need to replace:
GPU
PSU
RAM
SSD
AIO
CMOS battery
riser cable
If replacing the SSD requires a complete teardown, at least know what you are buying into.
A Real High-Power Example: RTX 5080 Versus RTX 5090
This comparison shows why “high-end GPU” is too vague for case planning.
NVIDIA lists the RTX 5080 Founders Edition at 304 mm long, 137 mm wide and two slots, the same basic published physical envelope as the RTX 5090 Founders Edition, but its TGP is 360 W rather than 575 W. NVIDIA specifies 850 W required system power for the RTX 5080 reference configuration.
Same nominal length.
Very different power.
That means two GPUs can pass the same mechanical clearance test while creating very different PSU and thermal requirements.
This is why I dislike one-dimensional compatibility charts.
They answer the easiest question.
Not the important one.
What I Would Reject Immediately
Some combinations are not worth rationalizing.
GPU Length Equal to Published Maximum
Reject it unless you have exact build evidence for the same chassis configuration.
One millimeter is not usable headroom.
12V-2x6 Cable Crushed Against the Side Panel
Reject it.
Reconfigure the cable, GPU orientation or case.
SFX-L PSU in a Build Designed Around SFX Cable Space
Recalculate everything.
That extra 30 mm can matter.
Radiator Support With No Thickness Information
Investigate before buying.
“240 mm supported” is incomplete.
GPU Fans Against a Solid Panel
Reject the layout unless credible thermal testing proves the spacing works.
Intake With No Exhaust Strategy
Fix the airflow plan.
Fans need a route.
Parts That Can Only Be Installed in One Fragile Sequence
Think carefully.
A build that works only when every component is inserted in a precise ten-step order may become unpleasant the first time something fails.
The Final Mini-ITX Case Compatibility Checklist
Before buying the case, I would want a clear yes beside every relevant item below:
Mini-ITX motherboard explicitly supported
exact GPU SKU verified
GPU length verified
GPU width verified
GPU thickness verified
GPU installation path verified
GPU power connector identified
12V-2x6 or PCIe cable routing verified
side-panel cable clearance verified
SFX or SFX-L PSU format confirmed
PSU wattage checked against hardware requirements
modular connector access verified
EPS cable reaches motherboard
CPU cooler height verified
radiator dimensions verified
radiator + fan thickness verified
RAM height checked
VRM heatsink clearance checked
AIO tube routing checked
GPU intake access confirmed
exhaust route confirmed
fan count and sizes confirmed
dust-filter restriction considered
M.2 installation access checked
2.5-inch drive compatibility checked if required
PCIe riser generation and length checked if used
front USB headers verified
front USB-C header verified if required
fan and ARGB headers planned
finished cable volume considered
major components remain serviceable
If several answers are “probably,” the build is not ready.
Measure again.
FAQs
What should I check for Mini-ITX case compatibility?
Mini-ITX case compatibility means verifying that the motherboard, graphics card, power supply, CPU cooler, radiator, memory, storage, cables and airflow system can all occupy their required physical space simultaneously while maintaining safe power delivery, adequate cooling, side-panel clearance and reasonable access for installation and future maintenance.
Start with your exact GPU and case model rather than generic product families. After confirming motherboard support, verify GPU length, thickness and width, then PSU format, GPU cable clearance, cooler dimensions, RAM interference and airflow. High-power components make small dimensional errors much more expensive.
How much GPU clearance should a Mini-ITX case have?
A Mini-ITX case should provide more usable GPU clearance than the graphics card's exact measured length, width and thickness, because published maximum length alone does not account for installation angle, radiator or fan intrusion, power-connector routing, side-panel clearance, airflow space, manufacturing tolerances or future service access.
I would avoid selecting a chassis whose maximum GPU length exactly matches the card. The tighter the build and the more expensive the hardware, the more valuable real mechanical margin becomes.
Can an RTX 5090 fit in a Mini-ITX case?
An RTX 5090 can fit in some Mini-ITX cases when the exact graphics-card model matches the chassis limits for length, width and thickness and the system also provides sufficient 12V-2x6 cable room, PSU capacity, intake airflow and exhaust capacity; compatibility must be checked by exact GPU SKU rather than by chipset name.
NVIDIA's Founders Edition is listed at 304 mm × 137 mm and two slots with a 575 W TGP, but NVIDIA explicitly notes that manufacturer designs vary.
Is an SFX PSU required for a Mini-ITX case?
An SFX PSU is required only when the specific Mini-ITX case is designed around the SFX form factor; some larger Mini-ITX chassis accept SFX-L or ATX units, but each format consumes different internal space and therefore changes cable clearance, GPU compatibility, cooling space and the location available for radiators or storage.
Check the exact chassis specification. Corsair's comparison illustrates the difference clearly: its referenced SFX unit is 100 mm long while the SFX-L model is 130 mm long.
Is a 1000 W PSU possible in a Mini-ITX gaming PC?
A 1000 W PSU is possible in a Mini-ITX gaming PC because modern high-density SFX power supplies are available at 1000 W and beyond, but wattage alone does not guarantee compatibility; builders must still verify PSU dimensions, ATX specification, GPU connectors, cable routing, ventilation and the chassis's supported power-supply form factor.
For example, Corsair lists an ATX 3.1 SF1000 in the SFX format, while Cooler Master lists its ATX 3.1 V SFX Platinum 1100 at 100 × 125 × 63.5 mm.
Is liquid cooling always better for a high-power Mini-ITX build?
Liquid cooling is not automatically better for a high-power Mini-ITX build because an AIO radiator, fans, tubes and pump block consume valuable chassis volume and may interfere with RAM, VRM heatsinks, GPU hardware, PSU cables or motherboard connectors, while a well-selected air cooler can sometimes produce a simpler and more serviceable layout.
Judge the complete cooling assembly rather than radiator length. A 240 mm label describes mounting class, not the full three-dimensional envelope of the installed cooler.
What is the best Mini-ITX case for a high-power build?
The best Mini-ITX case for a high-power build is a chassis that provides verified clearance for the exact GPU, suitable SFX or SFX-L PSU support, safe GPU power-cable routing, enough CPU cooling capacity, direct intake access, effective exhaust, sensible cable space and maintainable component access without unnecessary internal obstruction.
I would choose measurable compatibility over minimum volume. A slightly larger small form factor PC case that gives the GPU clean air and the power cable a safe route is usually a smarter high-performance design than the smallest enclosure you can technically close.
Build the Mini-ITX Case Around the Hardware, Not the Marketing
Do one thing before ordering your Mini-ITX case.
Open the specifications for your exact GPU, PSU, motherboard, RAM and cooler and write down the dimensions.
Not product-family names.
Numbers.
Then compare those numbers against the chassis in the configuration you will actually build: radiator installed, fans installed, PSU installed, GPU cable connected and side panels closed.
Use ACEGEEK's small-case high-end GPU compatibility checklist and large-GPU PC case guide as additional cross-checks before committing expensive hardware to a tight chassis.
The goal is not to prove that the components can be forced inside.
The goal is to build a Mini-ITX gaming PC that stays cool, receives stable power, closes without crushing cables, remains serviceable and still has enough margin to survive the next hardware upgrade.
Compact is good.
Compatible is better.